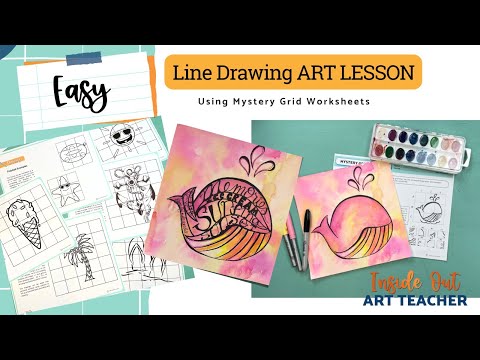
Are you looking for an excellent end-of-the-year art activity or lesson idea to wrap up the school year before summer break? Get ready to embrace the sunshine and channel those summer vibes with some easy summer line drawing and watercolor painting art lessons for middle school! What better way to capture the essence of the season than through beautiful line drawings that reflect the warmth and joy of summer?
Whether you’re an art teacher, experienced artist, or just starting, these easy summer line drawing end-of-the-year art lessons are perfect for everyone. They’re simple, fun, and a great way to get your creative juices flowing.
By following a few easy steps, you or your middle school students can create beautiful line drawings that capture the essence of summer. From beach scenes to sunsets to palm trees, there’s no shortage of inspiration for summer-themed line drawings.
Not only are these art lessons a great way to express your creativity, but they’re also a fun way to unwind and relax. The end-of-the-year can be challenging, but the puzzle-like nature of these quick art activities is a fun way to motivate even your most apathetic students.
Step 1: Finding the perfect reference image!
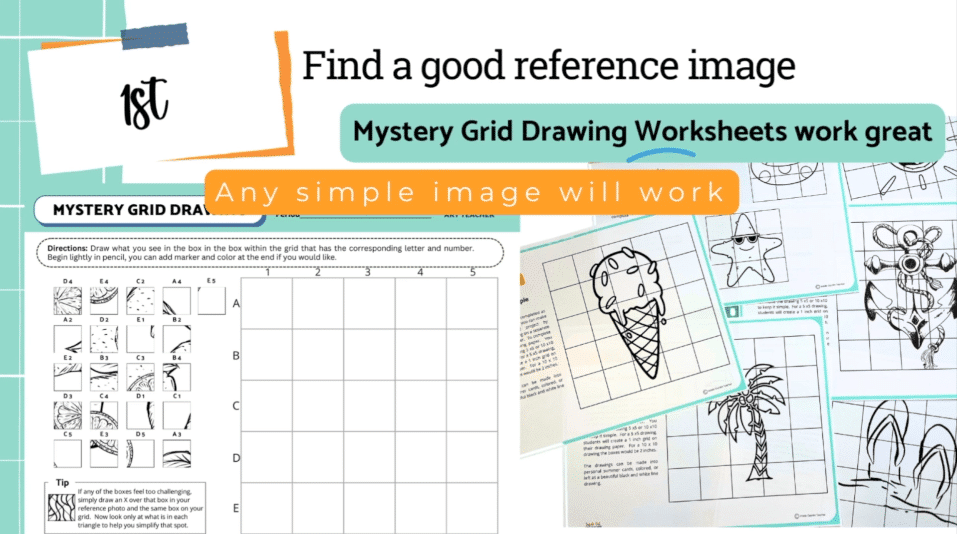
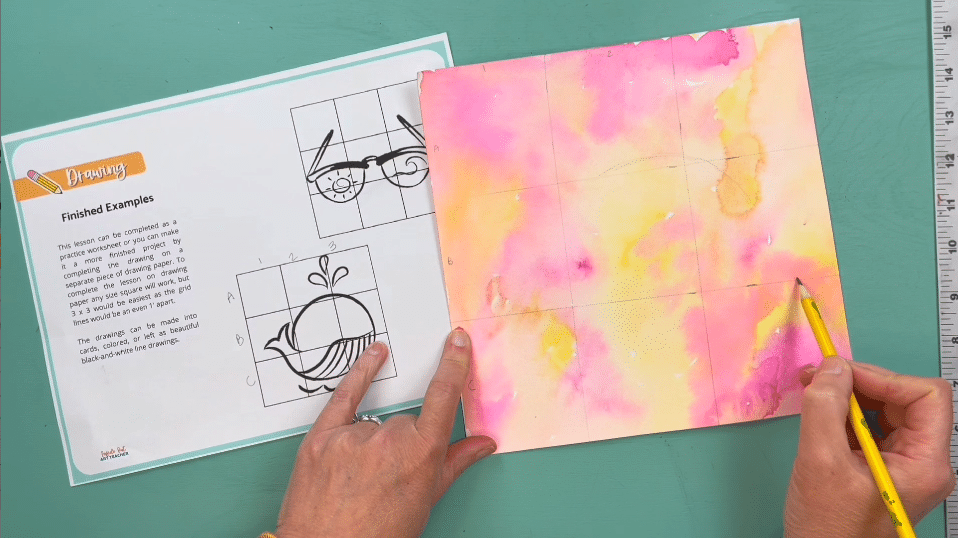
First things first – finding the perfect reference image! You might be thinking, “That’s easy, I can do that in my sleep!” But don’t underestimate the importance of choosing the right image. I’ve got you covered with some awesome mystery grid drawing worksheets (or you can choose your own image). Just make sure it screams summer vibes!

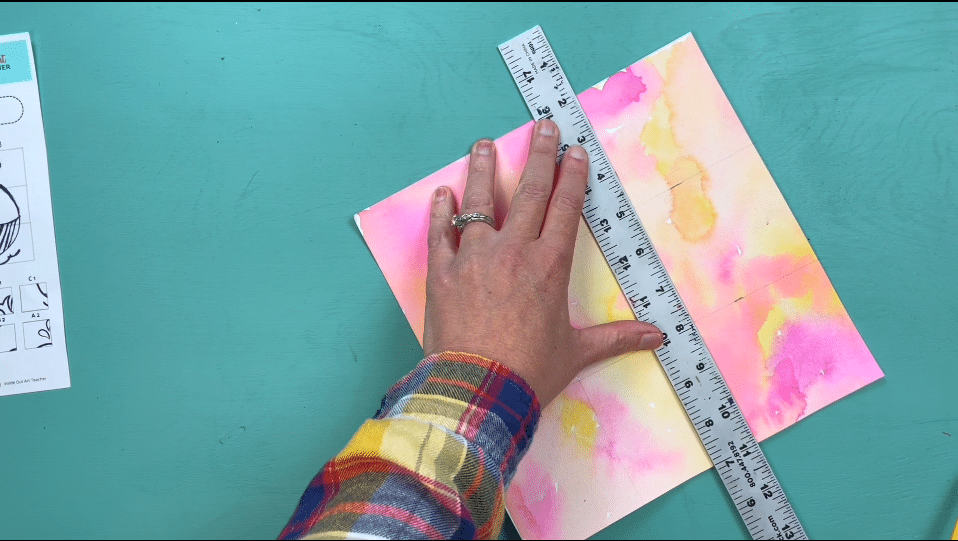
Now, let’s discuss prepping the drawing paper. To really capture that summertime feel, you’ll need a watercolor background. Students love this part because they get to let the colors bleed and paint flow.
Make sure students use lots of water and keep their colors super light. Remind them not to go too dark on the watercolor or they will have trouble seeing their drawing.
We want this end-of-the-year art lesson to be as easy and breezy as a summer day at the beach! So, remind students to take their time, use lots of water, and make sure everything is just right. With these tips in mind, you’ll be ready to move on to the next step in no time!
Step 2: Outlining your summer scene
Step 2 is all about getting the foundation of the drawing down on paper. To start, they will label their boxes and use the cover page as a guide for their outline. This will help them keep everything organized and on track.
When guiding your students, encourage them not to rush and to approach the task slowly and steadily. Start by having them lightly sketch their outlines with a pencil. Remind them to take their time to ensure they get it just right. Once they are satisfied with their pencil lines, introduce them to using a Sharpie marker. Instruct them to use the thicker end of the marker to go over the lines that need to be bolder. This process will help them gain confidence in their drawing skills while emphasizing the importance of careful observation and precision.
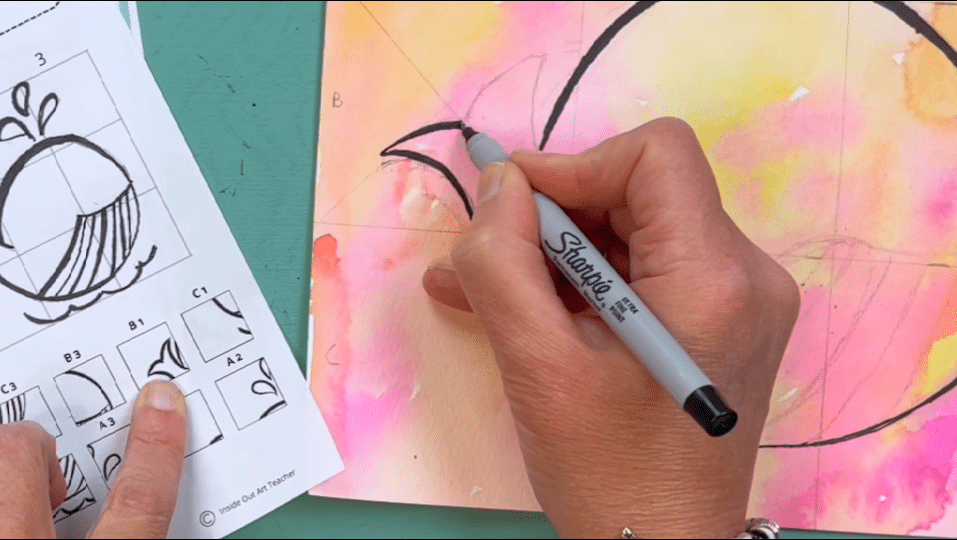
As you guide your students through the drawing process, encourage them to take a thinner marker to refine their lines. This step will help their artwork look more polished and professional. Remind them that they should aim for a smooth transition between thick and thin lines, much like a gentle summer breeze! Suggest that they continue to use their reference image as a guide. With this approach, they’ll be ready to add color to their creations in no time.
Step 3: Add a pop of color with watercolor, marker, or colored pencil!
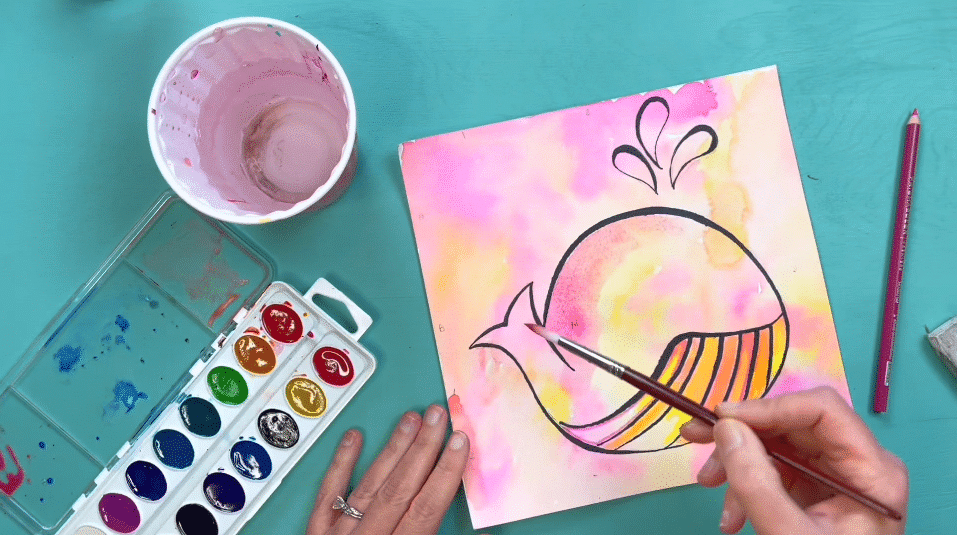
Now that your students have their outlines in place, it’s time for them to add some color to their summer line drawings. This step encourages them to add details to their drawings, which will help bring their artwork to life.
You can use lighter-colored markers, colored pencils, or even watercolors to add some color to your drawing. If you’re using watercolors, it’s important to keep the paint really watery and use light colors that match the background. If you use opposite colors, the colors might blend and turn brown, which could ruin the overall look of your drawing.
One way to add color is to look at your reference image and pick out some of the main colors that you see in the image. Try to use those colors in your drawing to create a cohesive look. You can add color to different parts of your drawing, such as the leaves on a palm tree or the stripes on a beach umbrella.
Remember, you don’t have to add too much detail if you don’t want to. Sometimes simple is best, especially for a summer-inspired line drawing. You can stop here and still have a beautiful piece of art, or you can move on to the next step for some additional flair.
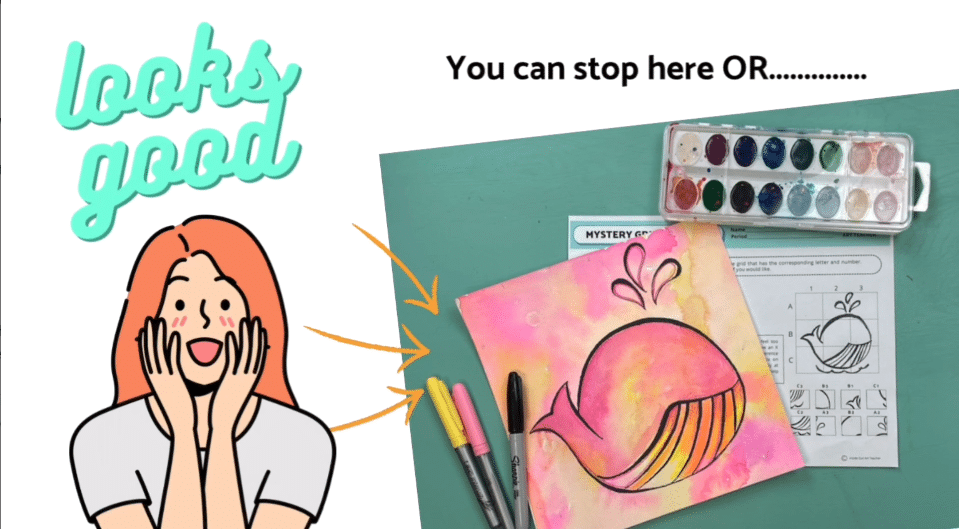
Step 4: Add some pizzazz to your drawing with text!
Congratulations, your drawing is already looking amazing! But if you want to take it up a notch, you can add some text and expressive fonts to your masterpiece. Let’s get started!
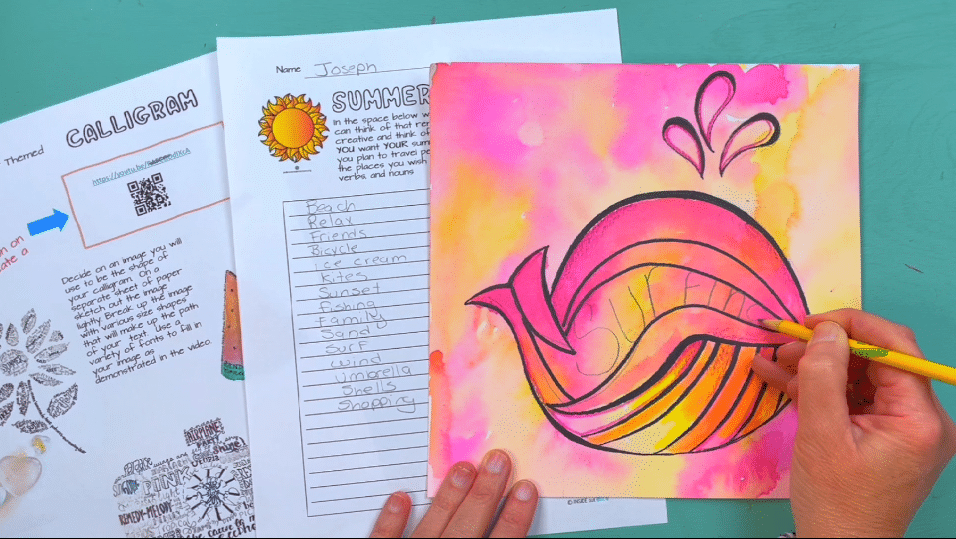
First, grab a pencil and determine the path of your line. For example, if you’re drawing a whale, follow the form of the whale’s body. Now it’s time to brainstorm some summer-themed words to use as your text. Think of words like “beach”, “sunshine”, “ice cream”, and “flip flops”. Get creative!

Once you have your guide marks and list of words, grab your thick and thin Sharpie markers and start going over your text. You can even use a font reference sheet for inspiration on different types of fonts to use.
Smooth out your lines until you’re happy with your design. And voila! You’ve just added a fun and personalized touch to your summer line drawing. It’s like adding a cherry on top of an already sweet treat!
Step 5: Have Fun!
The possibilities are endless with this easy end-of-the-year art lesson for the last days of school. You can pick an image that’s more intricate and detailed, or you could pick something super simple like a little whale. But it is the detail and the creativity that you put into them that make these really look amazing.
So have fun and enjoy the process! Summer is a time for creativity and relaxation, and these easy line drawing art lessons are the perfect way to get started. Don’t forget to share your creations with me (tag me in my socials) and happy drawing!
Want to Save Time or Need Ready-to-Go Reference Images and Practice Drawing Worksheets?
Looking for engaging summer-themed art projects for summer camp or any middle school art class? Look no further! This super fun summer-themed art lesson bundle is so versatile.

It contains 7 super fun art projects and 28 Mystery Grid Drawing Worksheets. Students love trying to solve the puzzle and guess what the different images are. The drawings can be finished with a marker or pencil. They can also be repurposed and used as reference images for the Summer Art Project Lesson included.
The projects use a variety of different mediums such as fine line markers, watercolor, pen and ink, acrylic paint, collage, and colored pencil. They are great for beginners with no drawing experience or more advanced artists.
Want more themed reference images and worksheets that speak to your student’s interests?
Looking for a high school end-of-the-year art project or middle school art lesson that will engage your students and save you time? Look no further! This super fun summer-themed art lesson bundle is so versatile.

The Mystery Grid Drawing Worksheets are great for sub plans, early finishers, or simple drawing exercises. The package contains 28 summer beach-themed mystery scramble grid drawing art worksheets. These make great reference images for the Summer Art Project that is also included.
Be the first to know about discounts, freebies, and new resources!
Find me on my blog – Inside Out Art Teacher, YouTube, or Instagram.