Are you ready to create a summer art project slash summer-themed masterpiece that’ll make everyone go, “Wowza!”? You’re in luck because I’m about to drop some knowledge bombs on how to combine two super-cool art techniques – Neurodoodles and Typography – to create a one-of-a-kind artwork that screams summer louder than a seagull on a beach!
As an art teacher, you may have experienced the struggle of keeping students engaged and focused as summer approaches. With the excitement of warmer weather and the anticipation of summer break, it can be challenging to keep students motivated and on task. But fear not, because this summer-themed art project is the perfect solution to channel their energy and creativity in a productive way.
If you want a deeper explanation of the process and more classroom ideas, you can explore my full guide to neurographic art here → Neurographic Art Ideas for the Classroom.
Get ready to soak up some serious beachy vibes, bask in the warm sunshine, and let you and your students’ creativity run wild as I guide you through every step of this awesome art project. Trust me, this lesson can save the day, keep your students productive and engaged as summer approaches, and let them channel their summer daydreams and create a masterpiece that they’ll be proud to display!
This lesson combines two lessons in my TPT shop. If you’ve already got the Neurodoodle lesson or any of my line drawing worksheets or sub plans, then this lesson is a fantastic way to repurpose those images in a totally new way. Or, if you’re feeling like treating yourself, you can snag the summer bundle listed below, which includes everything! It’s gonna be a blast, I promise! So, grab your art supplies, put on your favorite summer tunes, and let’s dive into this fun summer art project!
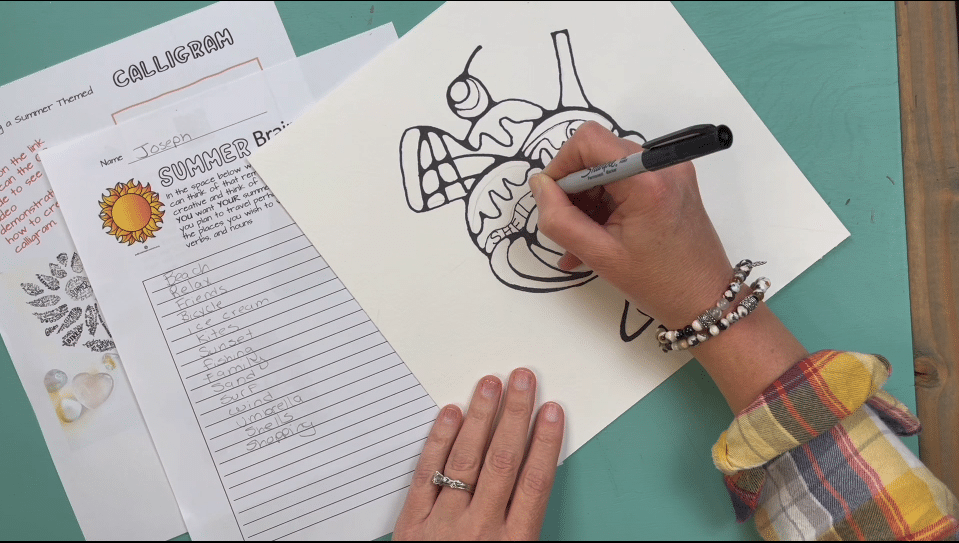
Step 1: Start with drawing an X-Grid
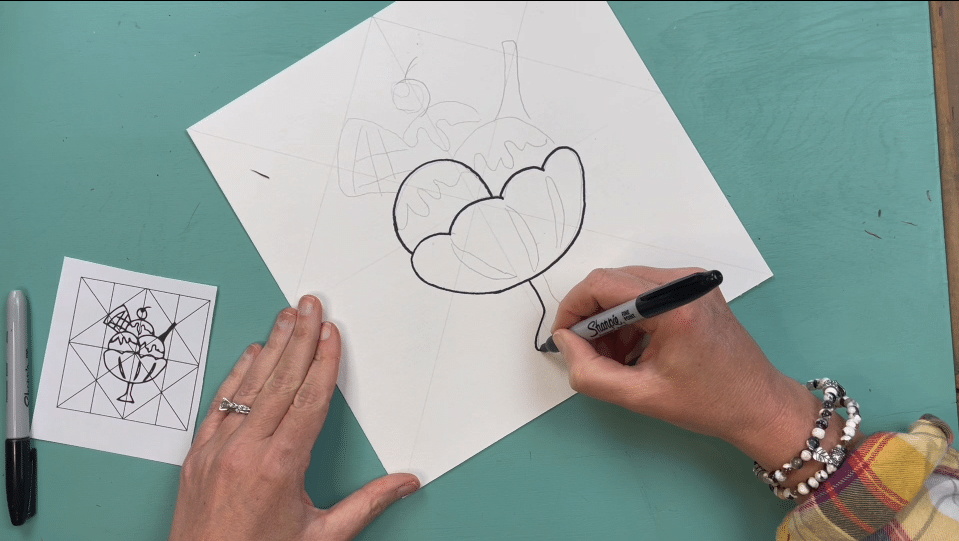
Alright, let’s get started! Find a clean sheet of paper and a pen or pencil to begin your creative journey. Draw an X grid on your paper to give yourself a little structure to work with. Now, the fun part – it’s time to let your imagination run wild! Think of all the things that remind you of summer, from beach balls and palm trees to ice cream cones and sunglasses. Use these ideas as inspiration to create your very own summer-themed image. (Psst, I’ve got some worksheets with summer-themed images for you to use as a reference – check them out here!)
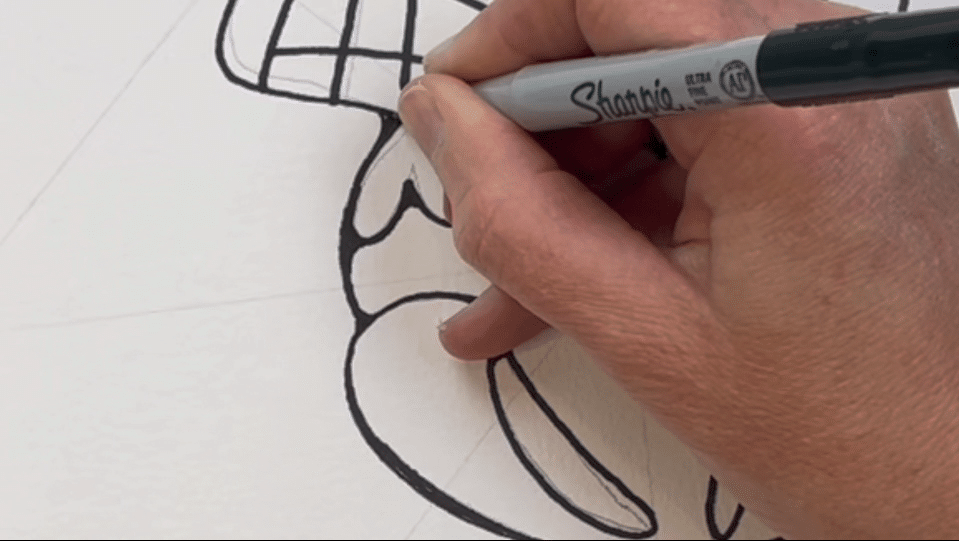
Once you’ve got your image drawn, it’s time to make it pop! Grab a black Sharpie and carefully outline your lines. Remember to vary your line thickness, going from thick to thin for a more dynamic effect. And if you come across any V shapes, simply round them out into U shapes to keep your lines consistent. But don’t stress too much over little mistakes – just keep the creative juices flowing and have fun with it!
Step 2: Flow with text by adding typography
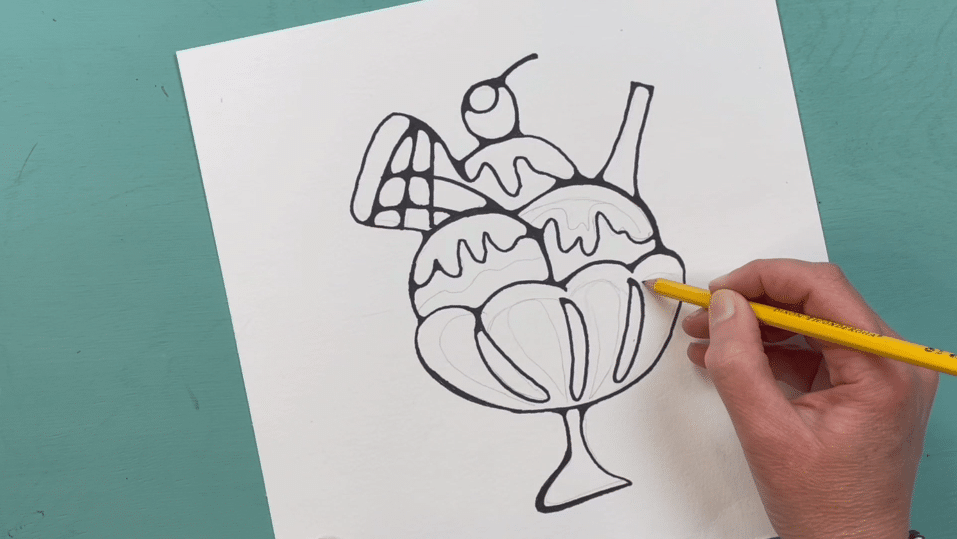
Now, it’s time to add some pizzazz to your design with some text! First things first, grab your trusty pencil and lightly sketch out the flow lines that your text will follow. Remember to mix it up with some thick and thin areas to create some shape and contrast. Then it’s time to whip out that marker and go over those lines like a boss. Just like we did with the image, we’re going to transform those harsh V shapes into smooth U shapes and round out those corners.
Next up, it’s brainstorm time! Think of all the things that scream “summer” to you and make a list. Ice cream? Check. Beach balls? Check. Sunscreen? Check. Now it’s time to use your creativity and experiment with as many fonts as possible. Trust me, this is where the fun really begins. Mix it up with different sizes, styles, and weights. Don’t be afraid to go wild and let your imagination run free like a stallion on a beach.
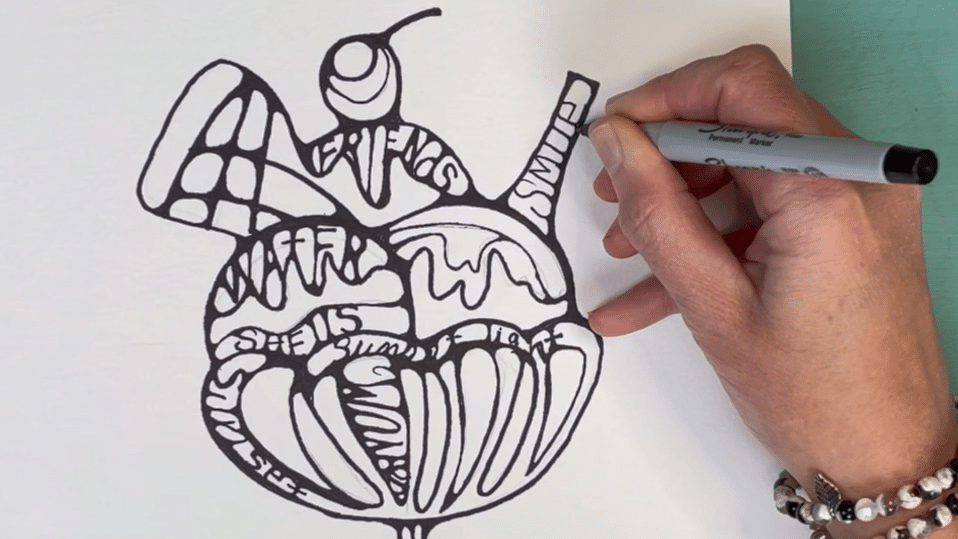
Once you’ve got your text looking super cool, it’s time to bring it all together. Combine those letters with the lines of your design and round out and connect your text to the image like two peas in a pod. Take your time, enjoy the process, and let your creative juices flow like a tropical drink on a hot day.
The best part? Once you’re done, you get to play a fun game of “Where’s Waldo” with your design. See if you can find different words and hidden messages that you didn’t notice before. It’s like a treasure hunt for your eyes! So go ahead and smooth out those lines, add some more words, and keep going until you’re 100% satisfied with your summer-themed masterpiece.
Step 3: Adding pops of color to your summer art project
So, after completing the previous steps, you’re now ready to add color to your design! This step is totally optional, but let’s be real, it’s the fun part. Adding a pop of color can really make your design come to life, so let’s get started.
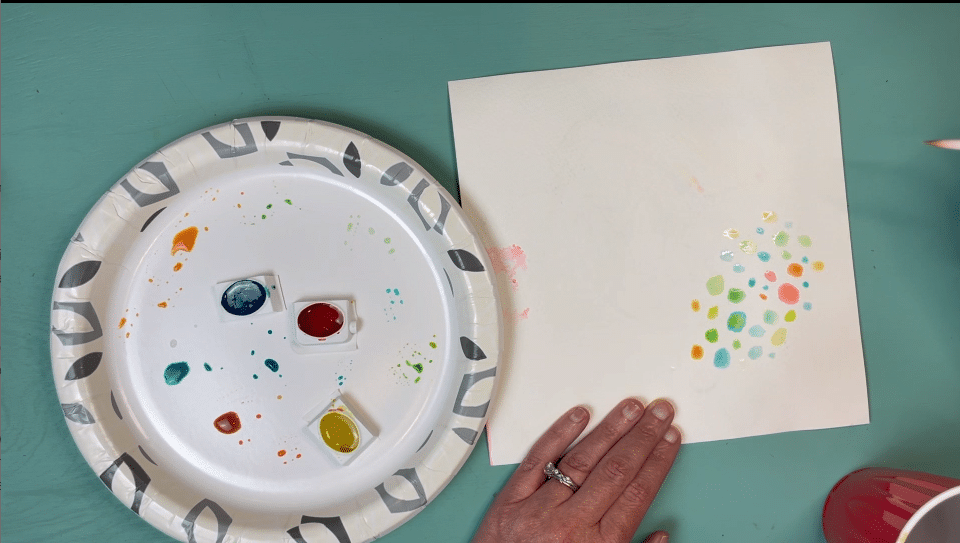
Before diving in with your watercolors, it’s always a good idea to practice a little first. You can grab a scrap piece of paper and test out your colors and brushstrokes before applying them to your actual design. This will help you get a feel for how the colors will look and how much water you need to add to your brush.
So, what I like to do is mix my colors from the primary colors: red, yellow, and blue. Once you’ve got your colors ready, it’s time to make some magic! I suggest keeping your watercolors watery because we’re going to play around with some fun little dots.
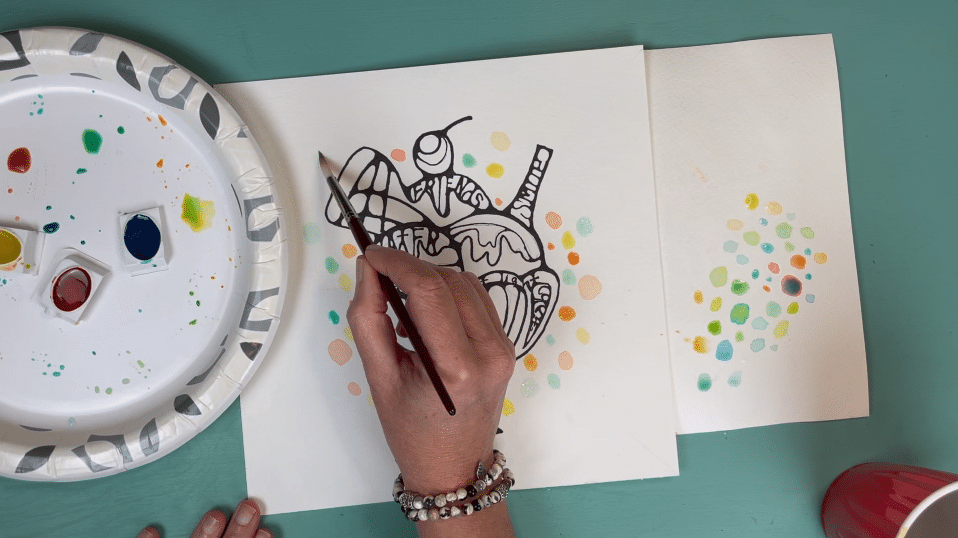
The idea behind using watercolors is to add a touch of color to your design without overpowering the rest of the artwork. Remember, less is more. If you feel like adding some watercolor washes to your background, go for it! The possibilities are endless. But for now, let’s stick to the dots. They’re super fun to make and will give your artwork an extra pop of color.
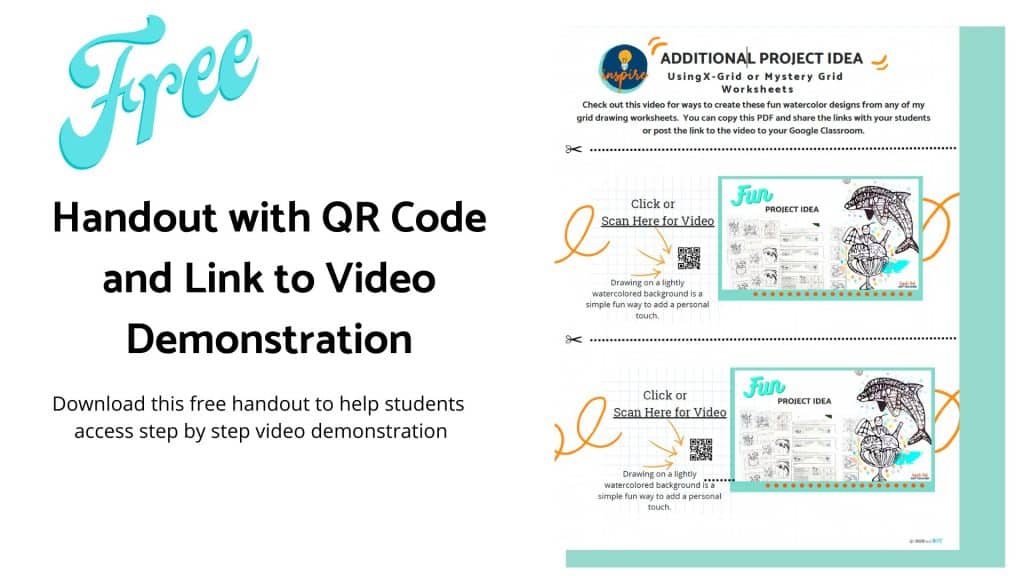
Check out the video demonstration linked above and download this free handout with link to the video to make sharing the video with students easy peasy. You can share the handout via Google Classroom or students can simply scan the QR code to see the step-by-step video instructions.
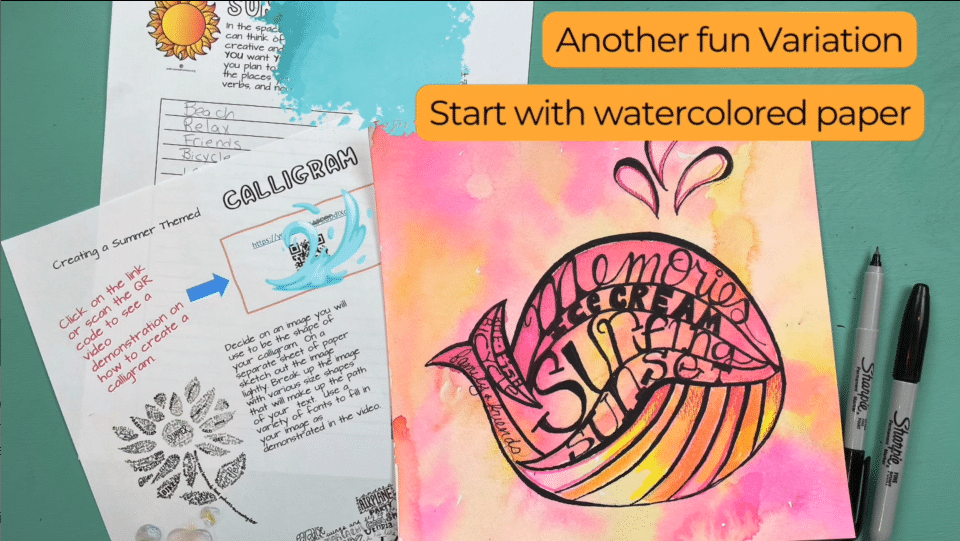
Now, here’s a fun variation you can try out – you can start with watercolor paper instead of plain paper.
Also, you can use any reference image you want, but I’ve got more links for you below to help you out. The most important thing is to enjoy the process! So, let’s add some color and let our creativity run wild. Try out different color combinations, make some patterns, and let your imagination soar. Remember, there are no right or wrong ways to do this. Just have fun and enjoy the experience of creating something beautiful!
Alrighty, art lovers, you made it to the end of this post! Give yourselves a round of applause! You’re now equipped with the knowledge and skills to create a summer-themed masterpiece that will make all your friends go “Wowza!”
From Neurodoodles to Typography to adding some pops of color, we covered all the steps needed to create a truly unique and eye-catching piece of artwork. And the best part? You get to unleash your creativity and have a ton of fun while doing it!
I suggest you check out this post that explains everything you need to know about Neurodoodle and its benefits if you haven’t already. Plus, the post includes a link to my YouTube tutorial video, which provides step-by-step instructions on how to create a Neurodoodle masterpiece.
So, what are you waiting for? Grab your art supplies, get in the summer mood, and let your creative juices flow like a tropical drink on a hot day. Remember, there’s no right or wrong way to do this – just let your imagination run wild and see where it takes you.
Discover more classroom ideas in this roundup of seasonal art lessons for middle and high school students.

My Free Summer Art Project is complete with:
✅ Student samples
✅ Worksheets to help brainstorm and sketch
✅ Typography worksheets
✅ A video demonstration you can show your students to introduce the project.
✅ Teacher instructions
✅ Grading Criteria

Related Neurographic & Art Project Ideas
- Neurographic Art Abstract Design Technique – Learn how to use flowing neurographic lines as a powerful abstract design strategy in any art project.
- Composition Techniques for Neurographic Art – Help students strengthen balance, movement, and visual flow in their neurographic compositions.
- Crystals Neurographic Designs – Explore a gem-inspired twist on neurographic art with bold shapes and striking color combinations.
- Neurographic Art Easy Doodle Drawing Project – A simple, engaging neurographic lesson that builds confidence with line, pattern, and color.
- Easy Summer Line Drawing in 5 Steps – A quick and approachable line drawing warm-up that pairs perfectly with neurodoodle projects.
Be the first to know about discounts, freebies, and new resources!
Find me on my blog – Inside Out Art Teacher, YouTube, or Instagram.