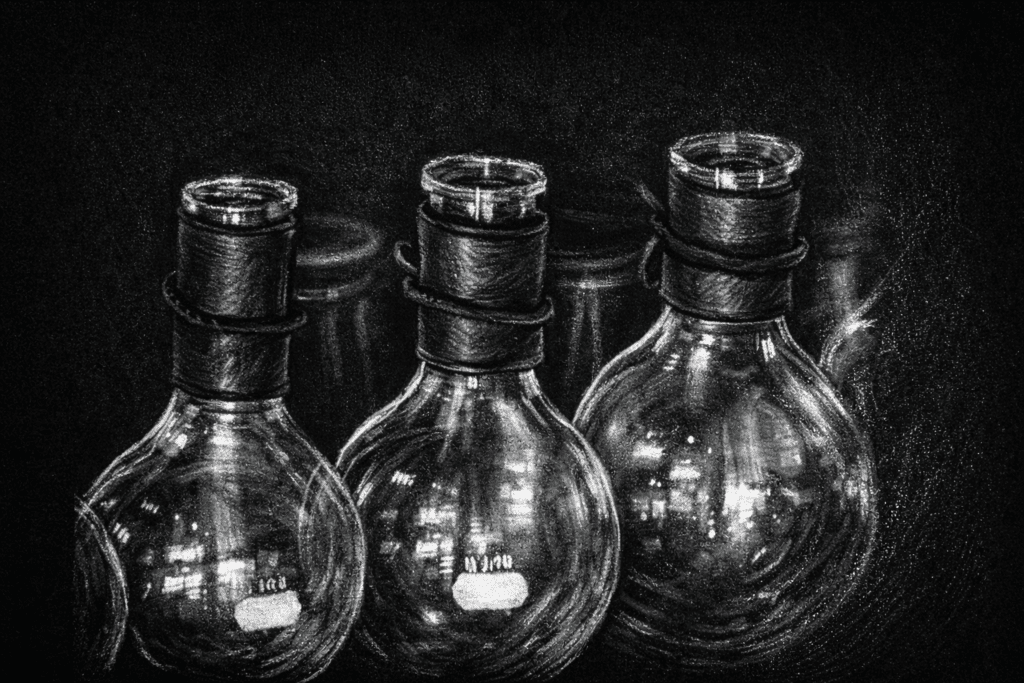
A Beginner’s Guide to Creating Stunning Glass Drawing on Black Paper (in only 7 Easy Steps!)
These glass drawing techniques are great for high school art classes, especially in mixed-level groups or advanced units where observational accuracy and refined blending are goals. If you are looking for ways to overcome the challenges art teachers often face, you’re in for an exciting journey. In this step-by-step guide, we’ll explore how to create a mesmerizing glass drawing on black construction paper using a white colored pencil. Along the way, I’ll share what worked well in my classroom and what didn’t, so you can learn from my experiences and make the most of your own artistic adventures. Get ready to dive into the world of creativity and overcome common challenges as we explore this mesmerizing project together.
What high school students learn from glass drawing
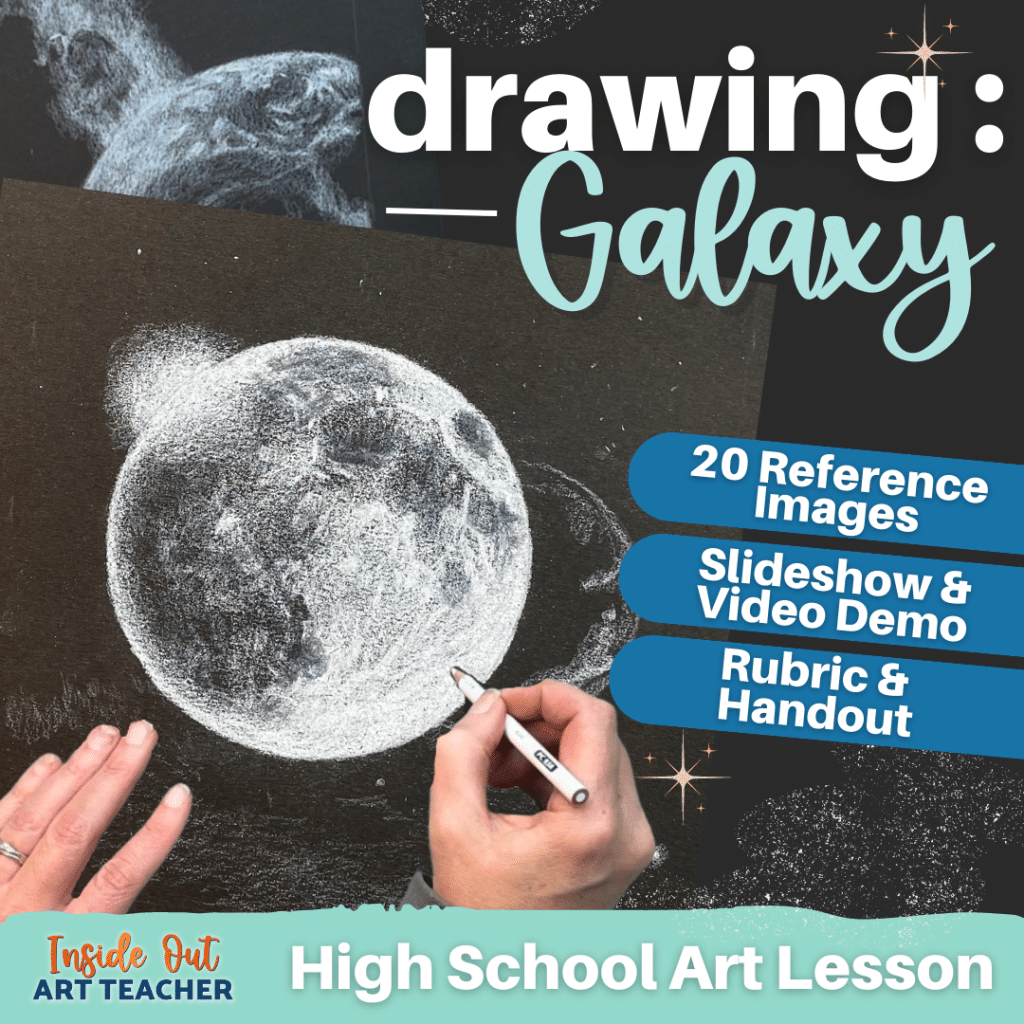
Glass drawing helps high school students move beyond basic shading and into more advanced observational skills. Through this project, students practice identifying subtle value shifts, controlling blending, and rendering highlights and transparency with intention. Because glass surfaces demand close attention to edges, reflections, and light sources, this lesson naturally builds patience, accuracy, and problem-solving skills. It works especially well in mixed-level classes, where glass can be offered as a more challenging subject for advanced students, while simpler forms—such as spheres or galaxy designs—allow less experienced students to build confidence and strengthen foundational drawing techniques.
Drawing glass is a powerful way to help students move beyond basic shading and begin noticing subtle value shifts, reflections, and highlights. Once students start to understand how light behaves on transparent surfaces, those same observation skills transfer into many other drawing and painting projects. If you’re looking for more classroom-tested lessons that build these kinds of technical drawing skills, you can explore this full collection ofhigh school art projects and drawing lessons designed for grades 9–12.
Step 1: Gather your art materials
Before we start, let’s make sure you have everything you need:
Step 2: Start with basic shading techniqueson your scrap paper
To start, grab a scrap piece of paper and your white colored pencil. This humble beginning is the foundation for mastering shading techniques. Begin with light strokes, gradually building up pressure to create darker shades. The key is to experiment with different pressures and strokes to understand how they affect the paper. This practice session serves as your playground, where you can freely explore the interplay of light and shadow.
As you delve into shading, keep in mind common challenges beginners face. Control over pressure is crucial; too light, and your shading may appear faint, too heavy, and it could become too dark. Achieving smooth transitions between light and dark areas requires finesse. But fear not, here are some of my practical tips are here to guide you. Start lightly and gradually increase pressure to build up darkness smoothly. Reference images can also be invaluable, offering insights into various shading techniques for you to emulate (check out the reference images I have prepped for you!)
In teaching, demonstrations are invaluable. Show your students the nuances between light and dark strokes, illustrating how they contribute to depth and realism in drawings. Emphasize the importance of practice, reassuring them that progress takes time and effort. Encourage starting with simple shapes and gradually advancing to more complex subjects.
Step 3: Map out the brightest highlights
Observation is key as you embark on this step. Take a close look at your reference photo, noticing where the light dances across the glass, creating those dazzling highlights. With your white colored pencil in hand, lightly sketch these areas onto your black paper. Think of it as mapping out the guiding stars that will lead your drawing to brilliance. Don’t fret if your markings seem tentative or unsure—it’s all part of the journey toward perfection.
For beginners, it’s common to feel a twinge of uncertainty creeping in. But fret not, for practical tips are here to guide you through. Trust your instincts as you mark the highlights, allowing your intuition to be your compass. Remember, this step is about laying the groundwork, not achieving perfection right away. Embrace the process, knowing that each stroke brings you closer to capturing the essence of light and glass on paper.
Educators, seize this opportunity to instill the art of observation in your students. Guide them in dissecting reference images, pinpointing the subtle interplay of light and shadow.
Step 4: Use layering technique with your white pencil to create depth
Now, it’s time to breathe life into your drawing by layering strokes to enhance depth and highlights. Just as you would add layers of clothing for warmth, layering in art adds richness and realism. Begin with a gentle touch, delicately layering strokes of your white colored pencil over the areas you’ve designated as highlights. This gradual buildup creates a foundation for the luminous parts of your glass, setting them aglow against the dark backdrop.
For novice artists, navigating the intricacies of layering can pose challenges. Overlapping strokes may darken areas unexpectedly, while maintaining consistent pressure requires finesse. But fear not, practical strategies are here to guide you. Practice patience and start with light strokes, gradually adding more layers to control the brightness. Keep your touch gentle, following the contours of the glass to maintain a natural texture. And should harsh lines appear, a gentle blend with your finger or a blending tool will smooth transitions seamlessly.
Educators, seize this opportunity to demonstrate the art of gradual layering to your students. Show them the importance of starting light and building up slowly for optimal control. Engage in discussions about pressure control and stroke direction, empowering them with the knowledge to navigate these challenges with confidence.
Step 5: Compare your drawing with the reference image and refine it accordingly
As you delve deeper into your drawing, channel your inner detective to maintain accuracy and proportions. Just as a detective pieces together clues to solve a mystery, compare different parts of your drawing to ensure they align with your reference photo. This vigilant comparison involves scrutinizing highlights, shadows, and proportions, refining your artwork with each observation. Remember, perfection is not the aim here—each comparison and adjustment contributes to the unfolding beauty on the paper.
For students, challenges may arise in keeping track of various elements or succumbing to frustration over imperfections. But fear not, practical and educational tips are here to guide you. Break down comparisons into manageable steps, focusing on small sections at a time to catch discrepancies effectively. Embrace imperfections as part of the learning journey, celebrating progress rather than aiming for flawless replication. Trust your instincts and don’t hesitate to make adjustments to achieve your desired outcome.
Educators, empower your students with the skills of visual comparison and patience. Guide them in breaking down comparisons into manageable steps and encourage them to take breaks when feeling overwhelmed. Foster a culture of celebrating progress and creative interpretation, emphasizing that art is a dynamic process guided by intuition.
Step 6: Gradually build up the highlights by adding more layers
As you progress, gradually intensify the brilliance of your highlights through layering. Just as adjusting a dimmer switch brightens a room, layering adds depth to your highlights, enhancing their luminosity. Employ a sharp white colored pencil with gentle strokes, meticulously building up layers over the mapped-out highlights. This method infuses your drawing with a sense of realism and depth, transforming it into a captivating three-dimensional marvel.
Students may encounter challenges in striking the right balance of brightness and preserving contrast. However, practical tips are at hand to aid them. Start with a light touch, gradually amplifying brightness to avoid overwhelming contrasts. Utilize a sharp pencil for precision and maintain gentle pressure to prevent oversaturation of the paper. And if highlights become too intense, employ blending techniques to soften transitions.
Educators, emphasize the subtlety of layering to your students, explaining how gradual changes in brightness yield more realistic effects. Introduce various layering techniques, such as cross-hatching and blending, to empower students in achieving desired levels of brilliance.
Step 7: Add finishing touches to your drawing
As you approach the final stages of your drawing, relish in the process of adding finishing touches. Much like adding the final strokes to a musical masterpiece, each layer and refinement brings your glass drawing closer to life. Take your time and immerse yourself in the intricacies of your artwork—it’s a testament to your dedication, observation, and creativity. With each deliberate stroke, you contribute to the captivating beauty that will grace your paper.
Students may encounter challenges such as impatience or overthinking in the final stages. However, practical strategies are available to guide them through. Take moments to pause, breathe, and reflect on your progress, allowing you to spot areas in need of refinement. Stay present and mindful as you add the finishing touches, engaging fully with your artwork. And remember, perfection is not the goal—embrace imperfections as they add character to your piece, celebrating your journey as you reach completion.
Educators, inspire your students to appreciate their progress and embrace patience in the final stages of their artwork. Encourage reflection on how far they’ve come, highlighting the significance of each layer added. Discuss the importance of taking time to ensure the drawing receives the attention it deserves, fostering a culture of mindful creation. With dedication and mindfulness, your students will bring their artistic visions to fruition, celebrating the completion of their masterpieces with pride.
Glass drawing is just one way to challenge students to slow down and truly observe what they see. For more projects that build value, shading, and observation skills, browse this collection of high school art lesson ideas and classroom drawing projects.
You can find this complete “Glass Drawing on Black Paper” lesson with reference images, slideshow, video demonstrations, practice worksheets, handouts, rubrics and more in my resource shop!
What’s included in this lesson? In this complete resource you get:
✅ 30 Gridded and Non-Gridded Reference Images of Glass
Investing in your artistic journey is an investment in yourself. This lesson is designed to empower you with knowledge, boost your confidence, and enhance your creative expression.
Don’t miss out on this incredible opportunity to refine your skills and create captivating artworks that stand out. Hop on this artistic adventure today!
Be the first to know about discounts, freebies, and new resources!