Negative Space Art Lesson for Beginners
Negative space art is one of the best ways to help beginner drawing students learn to see more accurately. In this lesson, middle and high school students create a colorful skeleton drawing by focusing first on the shapes between the bones rather than the bones themselves. This simple shift helps students slow down, observe carefully, and build confidence with drawing. This negative space art lesson helps middle and high school students learn an essential drawing skill while creating an engaging skeleton drawing project.
Why Teach Negative Space Drawing to Beginners?
Beginning artists often draw what they think they see instead of what is actually there. Teaching negative space drawing helps students notice proportion, placement, and shape relationships more clearly. It encourages careful observation and gives students a practical strategy for improving drawing accuracy without overwhelming them with too many skills at once.
If you are looking for more project ideas for your classroom, you can explore additional middle school art projects and high school art projects that focus on building foundational drawing skills and creative problem solving.
What Is Negative Space in Art?
Negative space is the area around and between objects. In this lesson, instead of drawing the skeleton directly, students focus on the spaces created between the bones. Learning to notice those shapes helps students understand both positive and negative space in art, which is an important foundation for more realistic drawing.
What Students Learn from This Negative Space Art Lesson
Students practice several foundational drawing skills during this lesson:
• observing shapes and relationships
• understanding positive and negative space
• comparing proportions
• slowing down and studying reference images
• building confidence with drawing processes
How to Teach This Negative Space Skeleton Drawing Lesson
This lesson begins with students observing a photo reference of bones and sketching only the shapes formed in the spaces between them. Since this can feel unfamiliar at first, it helps to start with a few practice sketches before moving on to watercolor paper for the final drawing. Once students are confident in the basic structure, they can add color to complete the project.
To see step-by-step instructions of this lesson, check out the video demonstration using watercolor and oils pastels above by Bethany Thiele.
Materials Needed for This Negative Space Art Lesson
-
skeleton bone reference photo
-
pencil
-
eraser
-
watercolor paper or drawing paper
-
watercolor paint or colored pencils
-
brushes and water containers
- any other mixed-media materials you wish to incorporate, such as colored pencils, markers, pastels, paint markers, etc.
A Great Halloween Art Lesson Option
Although this project can be taught any time of year as a drawing fundamentals lesson, many teachers also enjoy using it as a Halloween art activity. The skeleton subject matter naturally connects to seasonal classroom themes while still allowing students to focus on important drawing concepts like positive and negative space.
Because the lesson emphasizes observation and shape relationships rather than complicated anatomy, it works well for both middle and high school students. The finished skeleton drawings also make a fun and eye-catching Halloween art display in the classroom hallway.
For more creative Halloween Art Project ideas check out my Halloween Art Activities for the Classroom: Spooky and Creative Art Lessons post.
Step-by-Step Instructions for the Negative Space Skeleton Drawing

Step 1 :Observe the Skeleton Reference Image
Students begin by carefully observing the bones in the reference image. Instead of drawing the bones themselves, ask them to focus only on the shapes formed in the spaces between them. We use the
Step 2: Sketch the Negative Spaces First
Students lightly sketch the shapes they see between the bones. These shapes will gradually build the structure of the skeleton drawing. I like to teach students to use the X-grid method to get the placement of their shapes BEFORE adding detials. For a full explanation of this technique, see this guide on How to Draw Using the X-Grid Method.
Step 3: Refine the Skeleton Structure
Once the negative spaces are established, students can begin to lightly define the bones around those shapes.
Step 4: Transfer the Drawing to Final Paper
Have students redraw the skeleton on watercolor paper or heavier drawing paper before adding color.
Step 5: Add Color to Emphasize Positive and Negative Space
Once students have completed the structure of their skeleton drawing, they can begin adding color and personality to the positive and negative spaces.
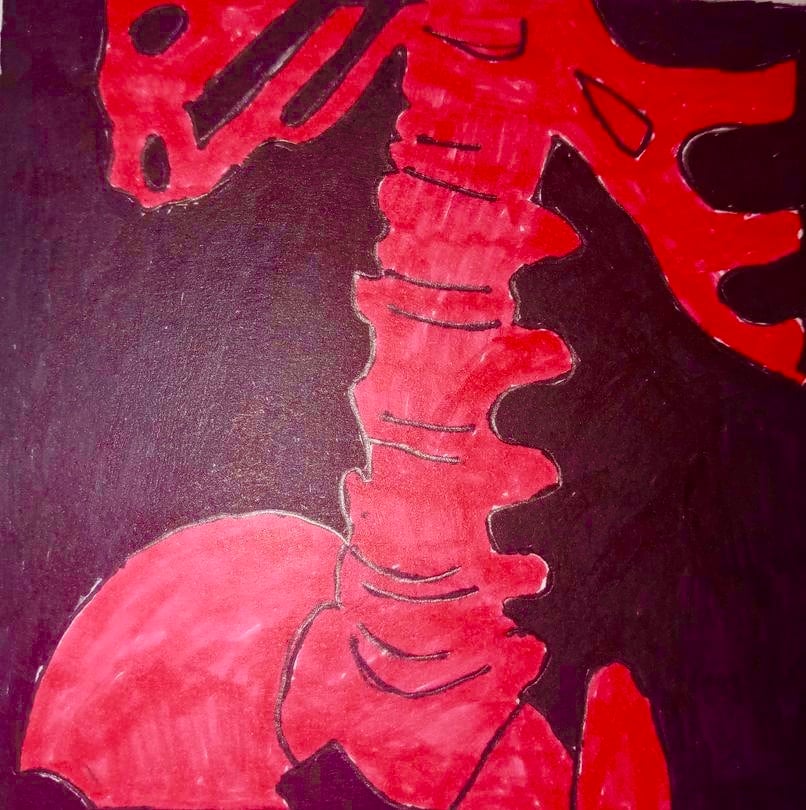
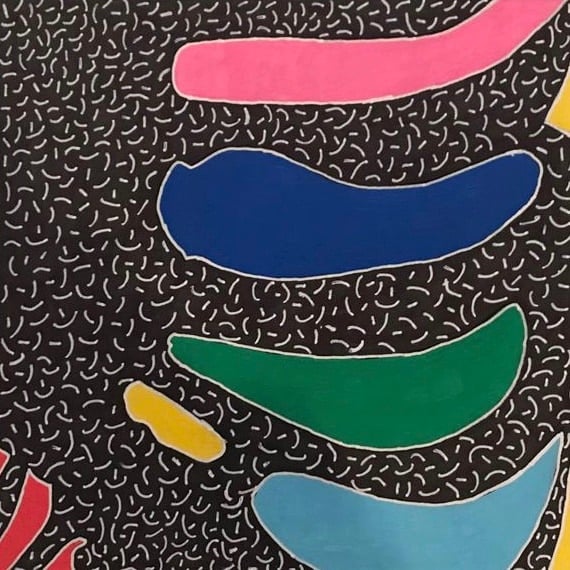
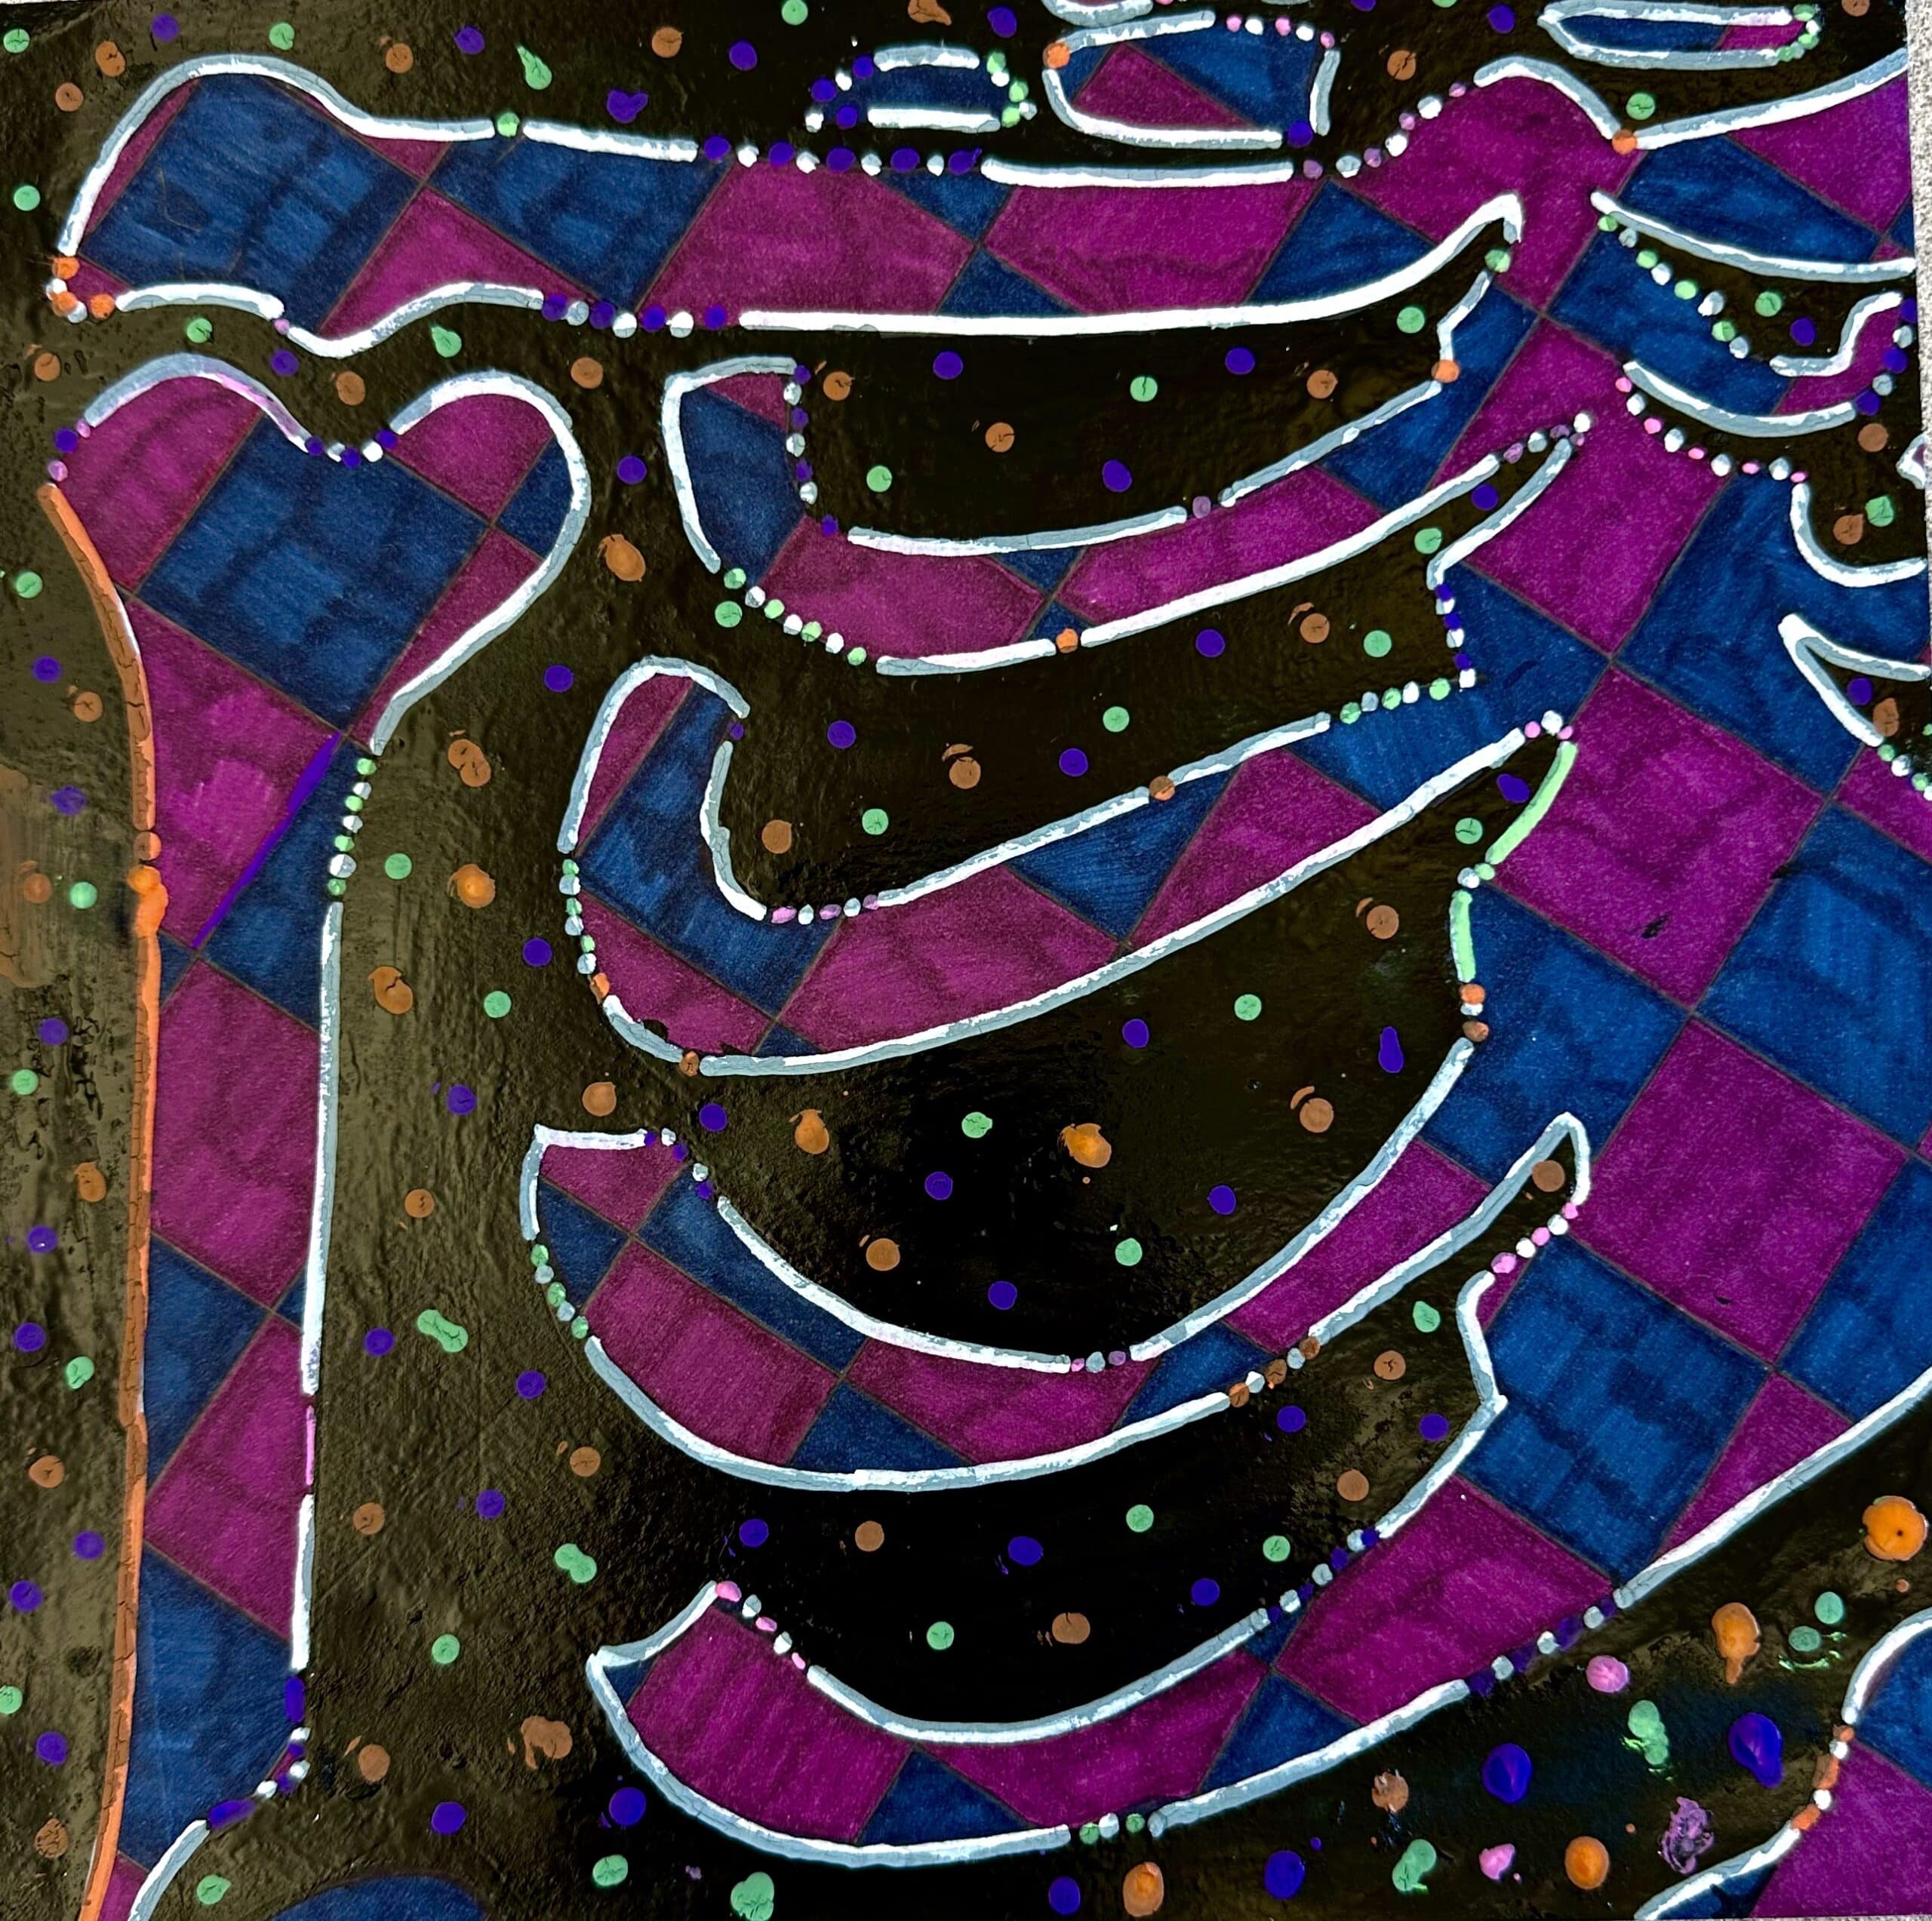
This part of the lesson allows students to experiment with materials while reinforcing their understanding of how positive and negative space interact in a composition. Encourage students to fill the background spaces and bone shapes with contrasting colors, patterns, or textures so the design becomes visually dynamic.
I have taught this negative and positive space lesson using a variety of materials, and each approach has been successful. Depending on the supplies available in your classroom, students can explore options such as watercolor, oil pastel, colored pencil, or marker. One particularly effective approach is to use warm and cool color schemes to create strong contrast between the positive and negative areas.
Students can also experiment with additional techniques such as:
-
collage
-
patterned designs
-
mixed media
-
different materials in each section
The goal is to give students the freedom to explore materials while continuing to think about the relationship between positive and negative space in art.
Some students may choose to keep their colors and materials consistent throughout the drawing, while others may fill each section with a different medium or technique. Both approaches can lead to unique and visually interesting results.
Below are examples of student skeleton drawings created during this lesson.
Tips for Teaching Negative Space Drawing

When introducing negative space drawing, students often need reminders and encouragement as they learn to observe in a new way. These strategies can help students feel more confident and successful during the lesson.
Encourage light sketching of grid lines. Light pencil lines allow students to adjust and refine their drawing as they work without feeling stuck with early marks.
Use the X-grid method to help students find shapes. This strategy helps students divide the image into smaller sections so they can focus on one area at a time. For a full explanation of this technique, see this guide on How to Draw Using the X-Grid Method.
Remind students that they are drawing shapes, not bones. Focusing on the shapes between the bones helps students avoid drawing what they think they see and instead draw what is actually there.
Start with quick warm-up sketches. Short practice sketches or worksheets can help students get comfortable identifying negative spaces before beginning the final drawing.
Encourage students to double-check their work. Let them know that drawings rarely look accurate on the first attempt. The second or third observation is often when they notice details they could not possibly see the first time.
Circulate around the room and demonstrate the process. Showing small groups how to break complex shapes into smaller sections can help students understand the observation process more clearly.
Celebrate when students find something they missed. Discovering a mistake during a second look is actually a success. It means the student is learning to observe more carefully, which is one of the most important skills in drawing.
If you would like more ideas for helping students develop a strong drawing mindset, see the “Design for Autopilot Instead of Fighting It” section in this post.
Why Negative Space Is Important for Learning to Draw
Learning to see negative space in art requires a major mindset shift. Instead of focusing only on objects, students begin noticing the spaces and shapes around those objects—things our brains normally filter out. This process encourages careful observation and helps students understand how artists build drawings step by step.
Through this lesson, students begin to recognize several important ideas about how drawing works:
-
Proportion and placement come before details. Students learn that the basic structure of a drawing must be established before focusing on smaller features.
-
Observation happens in stages. When looking at a reference image, students must scan it multiple times and notice different relationships each time. The brain cannot take in every detail at once.
-
Looking again is part of the process. When students notice something they missed during a second or third observation, that is actually a success. Many people look only once and assume they have seen everything.
-
Shapes must be compared to each other. Students begin to judge size, angles, and spacing by comparing one shape to another rather than guessing.
-
Drawing is a process that can be learned. Once students understand the steps involved—observing, sketching basic shapes, refining placement, and then adding detail—they gain confidence and realize that drawing is a skill they can develop.
Next Project in this Beginner Drawing Unit
Once students are comfortable seeing shapes and space differently, I like to build on that confidence with a structured line-drawing lesson that helps everything click.
👉 Check out this post on 3 No-Prep Beginner Drawing Lessons for Overwhelmed Middle & High School Art Teachers to see how this negative space project fits into a scaffolded beginner drawing sequence.
More Beginner Drawing Lessons for Art Class
If you want the done-for-you resource, check out this complete negative space project here:
What’s included? In this complete negative and positive space lesson you get:
✅ 20 Worksheets and Reference Images
✅ Editable Slideshow
✅ 3 Video Demonstrations
✅ Lesson Handouts
✅ Rubrics

Complete Negative Space Skeleton Drawing Lesson for Middle & High School 🎨
👉CHECK OUT THE LESSON NOW 👈
Be the first to know about discounts, freebies, and new resources!
Find me on my blog – Inside Out Art Teacher, YouTube, or Instagram.
Frequently Asked Questions About Negative Space Drawing
What is negative space in art?
Negative space is the area around and between objects. Artists use negative space to help understand proportions, placement, and relationships between shapes.
Why is negative space important for drawing?
Focusing on negative space helps artists draw more accurately because it encourages careful observation instead of relying on assumptions about what objects look like.
Is negative space drawing good for beginners?
Yes. Negative space drawing helps beginner artists slow down and observe shapes more carefully, which improves proportion and accuracy.
What grade level is this lesson best for?
This project works well for middle school and high school art classes, especially when students are beginning to develop observational drawing skills.


