This art lesson is one of my favorite high school art projects because it is so simple and builds the foundation for everything we do for the rest of the year.
People are often most impressed by drawings with good shading because adding value to an object makes them appear three-dimensional and can produce the effect of realism. Learning to see value and notice light on forms is an acquired skill that comes with practice. It is not an innate talent that only some people are born with, contrary to most people’s beliefs.
Getting students to believe that they can be taught how to draw is not an easy task. They have been conditioned to believe otherwise and because of failed earlier attempts, they have probably already convinced themselves that it is just not possible.
So how do you prove your student’s misconceptions wrong and get them to believe their efforts will be worth the reward?
Recognizing what your students are thinking and feeling and letting them know you understand and have taken steps to ensure they will not fail can ease their anxieties and build trust between you. This trust is critical here because shading is such a foundational skill that can lead to success at everything else. It can be the lesson that completely changes how students see themselves and their drawing abilities.
Below are some trust-building strategies and ingredients that I make sure I include in all of my very first shading high school art projects:
5 ingredients to include in your shading high school art projects:
1. Start with small scale skill building activities and have students practice shading using reference images that are very simple shapes with flat planes of value.
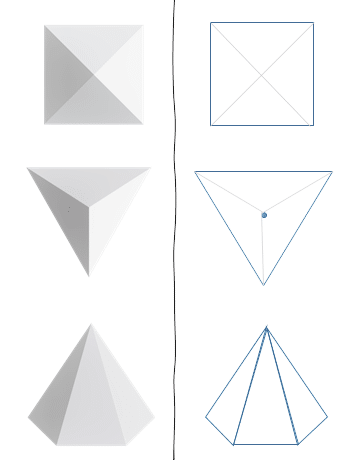


Choosing very small and simple reference images with flat planes (no transitions) of value allows students to focus on developing good form and practicing technique while also developing the habit of looking closely at the reference image to make sure they are working in the correct values. Working with flat planes of value makes it easier to tell if the values are accurate and it is easier for them to see if their shading is even or sketchy.
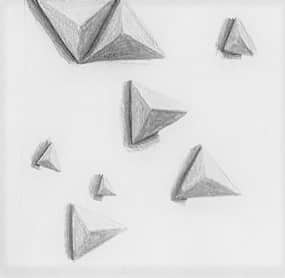
Because the images are small (only about 1-2 inches), students can achieve success and see results in their drawings quickly. They won’t get overwhelmed by the amount of surface they need to cover and after they complete one shape they feel more motivated to try another slightly more complex shape because they have already proven to themselves that they can do it.
2. Demonstrate good form and point out common mistakes before they begin their first shading exercise.
I personally like to show video demonstrations and or slideshows demonstrating proper technique for all art projects before students begin. I find these to be better than in-person demonstrations because they can speed up the instruction process and keep students’ attention longer. Also, they are great to have available when students come late to class, miss a demonstration, or are distance learning and you can reuse them year after year.
I show my students the above video demonstration and use these worksheets that contain the reference images and rubrics used in the video.
If you’re looking for more drawing skill-builder printables like these, you can browse my full Art Worksheets collection here.
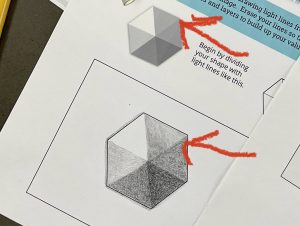
When you demonstrate the shading technique, make sure you break down what you want students to focus on into simple steps and repeat them often. Also, reiterate them often as students are working. These are the steps I always include:
- Use short strokes and a circular motion.
- Do not press hard.
- Build value slowly in layers.
- Have patience and work slowly.
- Do not smudge.
- No outlines, use shading to show edges.
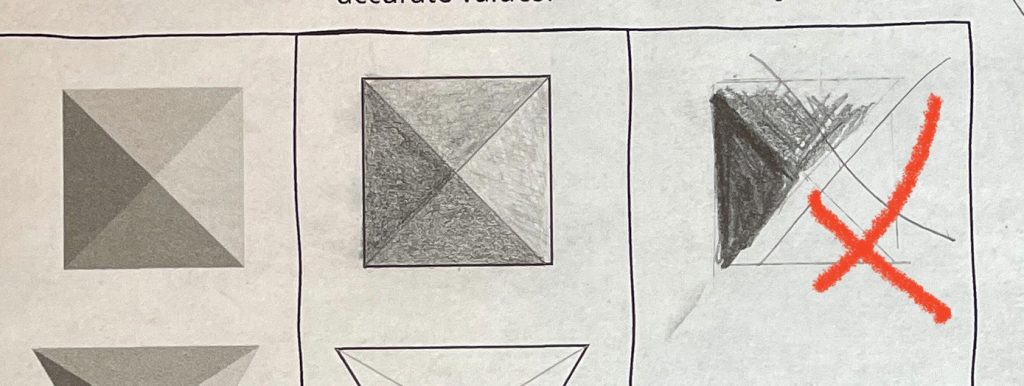
In addition to demonstrating proper shading technique, I also find it helps to demonstrate improper shading technique and show students common mistakes. Sometimes just seeing what not to do will help students be mindful of avoiding common drawing problems.
3. Stress mindfulness and practicing non-judgement.
We live in a world of multi-tasking that values completing as much as possible in a short period of time. Our brains are so wired to finish the task at hand so we can move on to the next thing. When learning to shade it is so important to go slowly and trust the process. Students are not exactly used to this.
I find it is so helpful to explain that getting swept away into the mindset of getting to the end result as quickly as possible is normal and likely will happen to them. I tell them if they catch themselves starting to rush or forgetting to slow down, they should celebrate that awareness and consider it a win. Most people don’t even notice when they are doing it. Once they notice what they are doing, then they can change it. If they don’t even notice it then they can’t get better.
Beginning artists tend to judge their own work too quickly and because they don’t have enough experience with the process they don’t realize that with layers and time the drawing will come together. They will often quit if they don’t think their work looks good right away.
Stressing the fact that the first layers of shading will not look perfect helps students not judge themselves so quickly. Nobody likes criticism yet so many of us are our own worst critics. Especially students learning something new like shading.
I sometimes show examples of really awesome detailed finished work in the early stages and explain that even the work of the most experienced artists has to go through some awkward stages. This helps them trust and believe that if they focus on good form and follow the process I demonstrated they will get better and can learn to draw well.
Because it is hard to believe something you haven’t seen happen yet I try to keep examples handy to show them often to students who are looking skeptical.
4. Remind students to look at the reference photos often and compare their values to the image.
Even though the shapes are small, there are still many new things being introduced at once. It is so easy for students to hyperfocus on one area and forget about others. Our analytical brains are so intrusive and getting lost in the layering and technique while forgetting to check values is so common and happens all the time to even more advanced artists.
5. When students think they are done have them go back and look at where one value meets the next and compare again.
I always tell students that it is THIS is the step that takes a good drawing to great and that they should EXPECT to find something they didn’t notice the first time. Really emphasizing that finding mistakes is not a bad thing, but simply a part of the process that often gets overlooked helps them develop the habit of careful observation from the start.
Next Up: Value Transitions

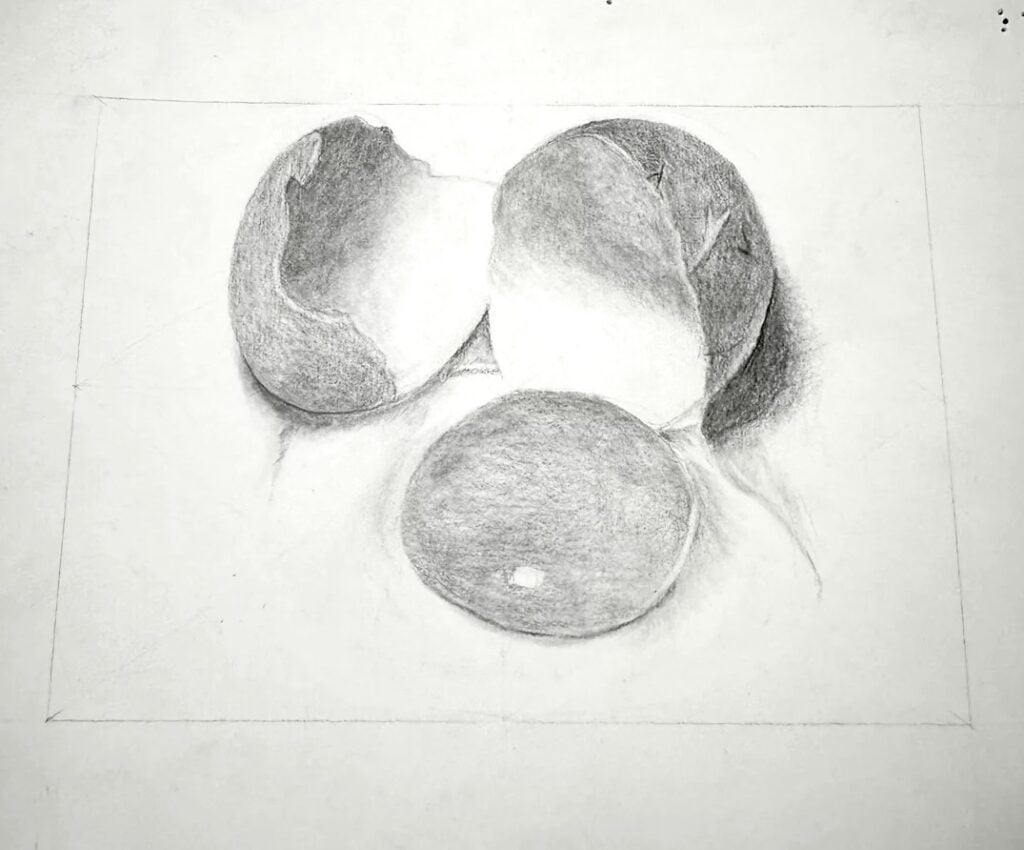
Once students have mastered flat planes of value and feel confident with their shapes, they can move on to simple forms with value transitions. For this exercise, a simple sphere will work or you can use any small-scale images that contain simple transitions of value. The worksheets I use in the video also include some very simple shapes with value transitions. I will also list some suggestions for reference images, skill builders, and shading project Ideas below.
You can find these beginner shading worksheets below.


More Art Project Ideas for High School with Shading
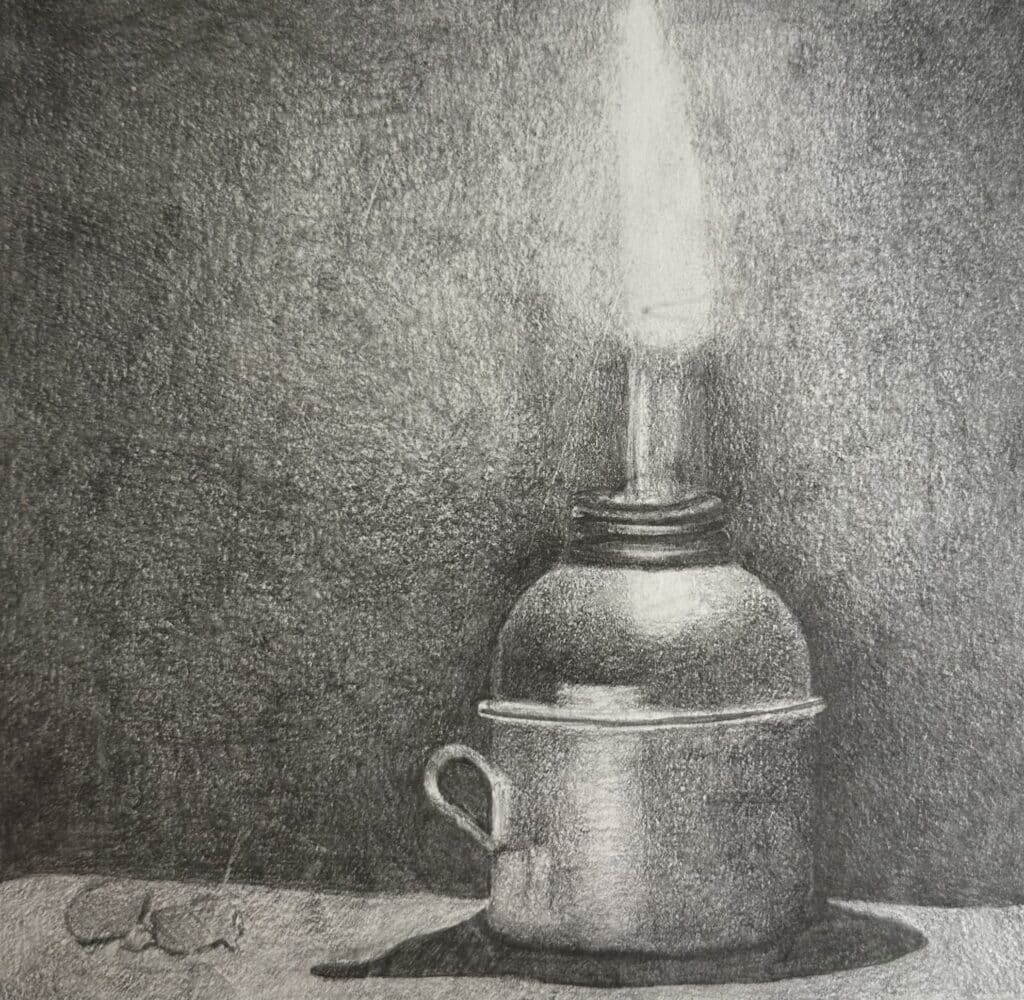
The ” How to Draw a Candle with Graphite ” lesson below is one of my go-to projects for teaching beginners about value and light. This lesson is a great follow-up to the geometric shapes skill-building worksheets. I like this lesson because the subject matter is simple and easy to draw, allowing students to focus on their shading skills and apply what they learned from the worksheets. The trick with any shading lesson is to remind students periodically to press lightly, keep pencils sharp, and build values in layers with short strokes.
Easy Shading with Graphite Lesson: Candle Drawing


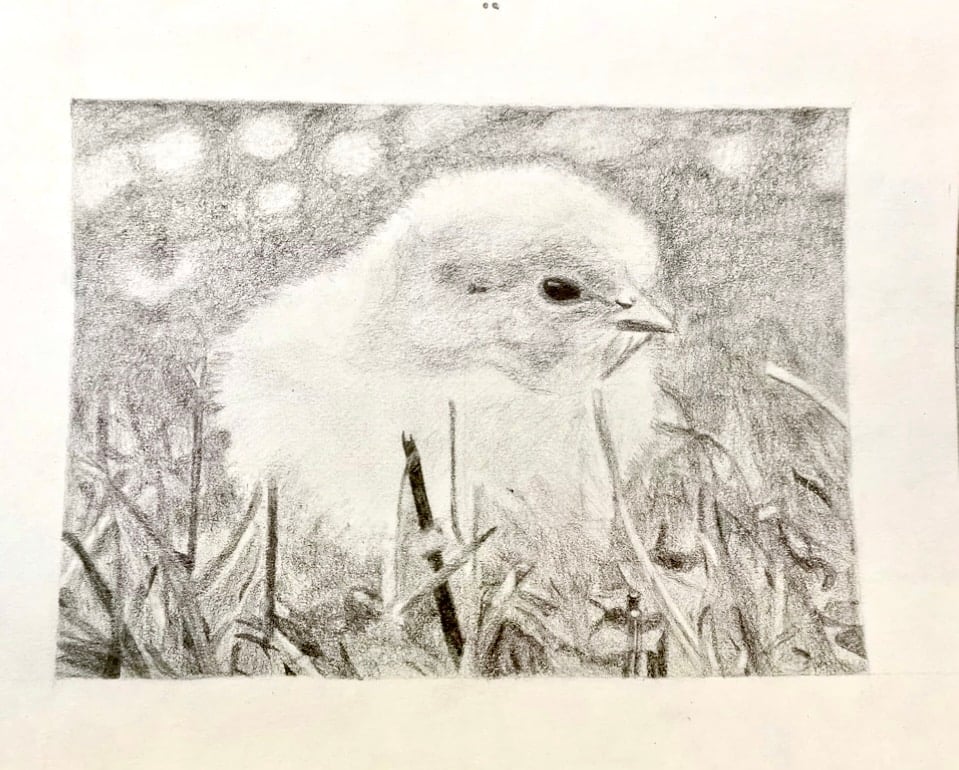
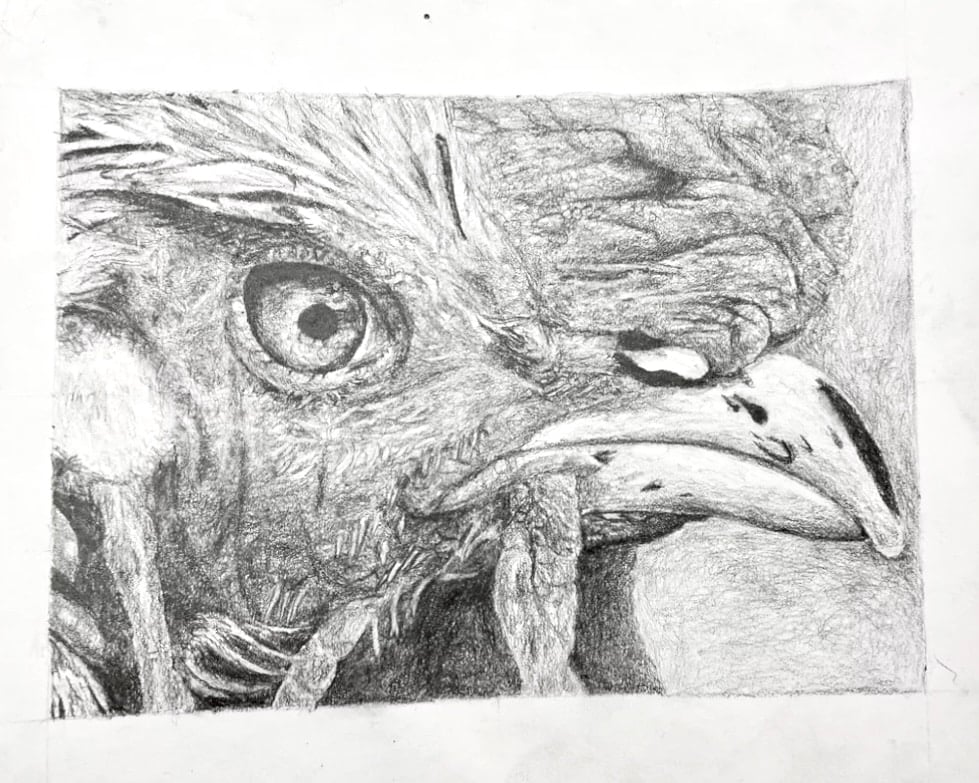
Shading Spring Art Project for High School with Texture
This is a slightly more challenging subject that can be offered to more advanced students in mixed-level classes or as a follow-up to the candle drawing lesson. The theme “Chicken or the Egg” makes it a fun art project for spring or any time of year. The inclusion of more complex subject matter and texture encourages closer observation and problem-solving.
Galaxy Easy Drawing on Black Paper with White Charcoal
This value-drawing-on-black-paper lesson switches things up and challenges students to look for highlights rather than shadows. The sphere is a simple enough shape to draw, and the subtle shifts in value force students to really look for tiny shifts and learn how to layer colored pencil or white charcoal to create smooth transitions of value.


Be the first to know about discounts, freebies, and new resources!
Find me on my blog – Inside Out Art Teacher, YouTube, or Instagram.