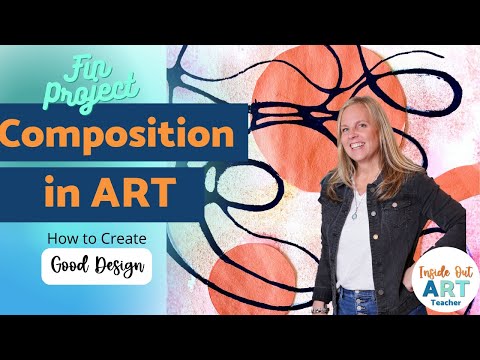
Hey there, art teachers, art enthusiasts, and neurographic design lovers! Are you ready to dive into the wonderful world of Neurodoodle designs with your high school students? Buckle up, because today I’m going to take you on a journey to create seriously awesome artwork that will blow your mind and make your students feel like true artists!
First things first, let’s talk about composition. It’s the secret ingredient that will take your art from bland to grand. I’ll show you how to arrange different elements in your artwork to make it look visually pleasing and balanced.
But wait, there’s more! I’ll also teach you some tips and tricks to make your artwork pop. From playing around with color schemes to experimenting with different textures and patterns, I’ll give you all the tips and tricks you need to create artwork that will stand out from the rest.
And the best part? We’ll do it all while having a blast! I’ll provide you with some fun exercises and challenges that will spark your students’ creativity and imagination (check out my free composition slideshow that goes with my YouTube video at the end of my blog post!)
So, are you excited to take your art to the next level? Let’s get started and make some seriously awesome Neurodoodle designs together!
If you’re new to this technique or want to see more classroom variations, you can explore my full guide to neurographic art ideas and lessons here → neurographic art lesson ideas.
Start with a splashy background
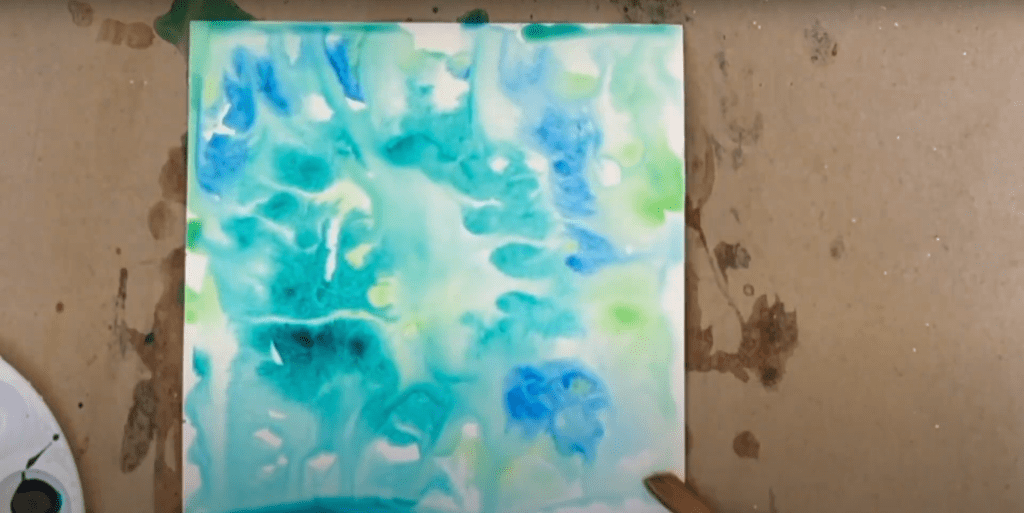
So, the key to creating a really cool Neurodoodle design is to start with a splashy watercolor background. For more neurographic art explorations and fun design techniques, check out our Neurographic Art Abstract Design Technique post. This is where the fun really begins! You’ll want to grab some watercolor paints, a brush, and some water. And don’t forget to put on some old clothes or an apron, because things are about to get messy!
The secret to getting that beautiful watercolor effect is to use lots of water. This will help the colors bleed into each other and create a really unique look. Don’t be afraid to experiment with different color combinations, but remember to choose analogous colors that are next to each other on the color wheel. This will help create a cohesive color scheme that ties your design together.
And one more thing – when it comes to watercolor, lighter is better! Using light colors will give you that cool bleeding effect that makes watercolor so special. So grab your paints, have some fun, and let your creativity run wild!
Repeat and vary one simple shape
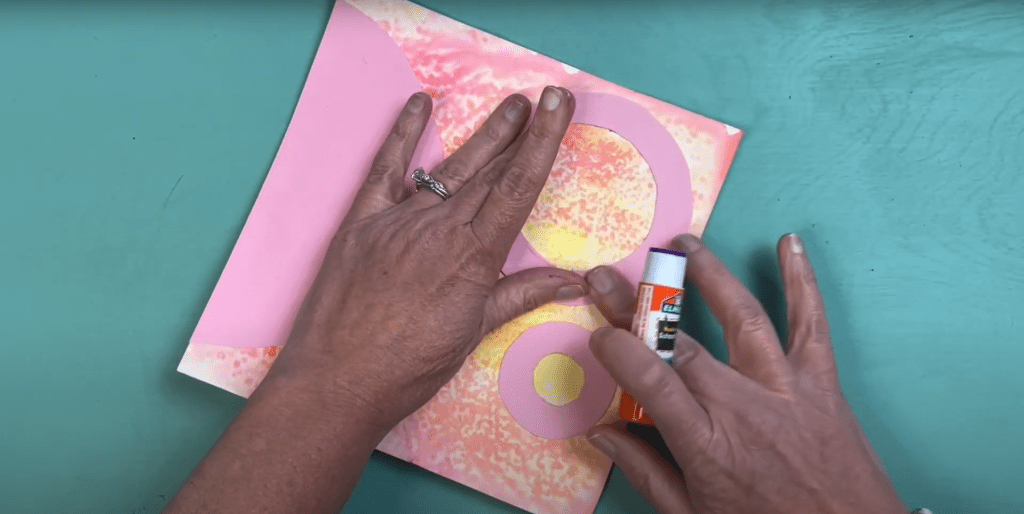
Now that you’ve got a splashy background going, let’s dive into the next step! We’re going to be using one of the most powerful design principles out there: repetition and variation. It’s like peanut butter and jelly, macaroni and cheese, or Batman and Robin – they just go together so well.
So, grab one simple shape and let’s get started. Maybe you choose a circle, or a triangle, or a square – it doesn’t matter, as long as it’s something easy to draw. Now, you’re going to repeat that shape, but each time you do, you’re going to vary it in some way. Maybe you make one shape bigger, or smaller, or cut a hole in the middle of it. This creates a sense of movement and visual interest on your page.
Once you’re happy with your design, it’s time to commit and paste it down. And don’t worry if it’s not perfect – imperfections are what make art unique and interesting. Now, you’re ready for the next step in creating your awesome Neurodoodle design!
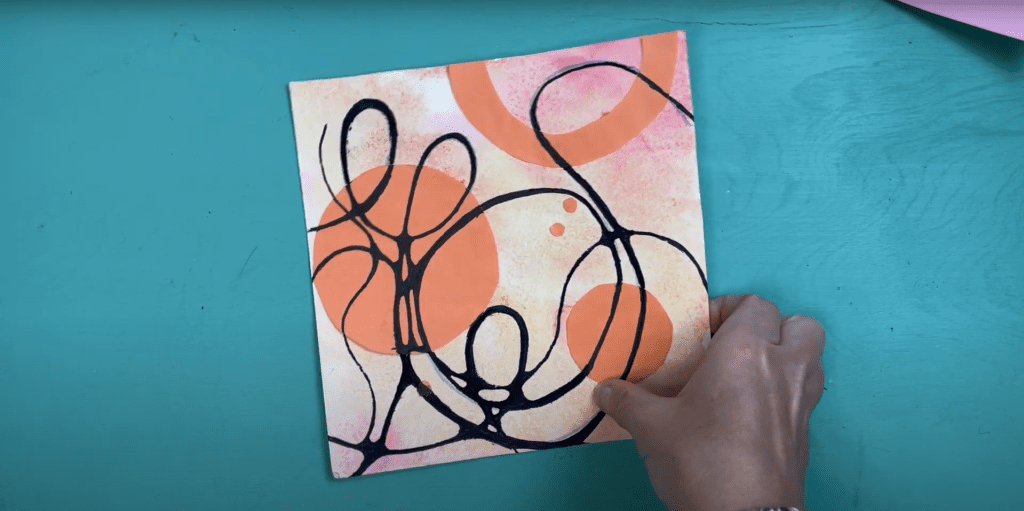
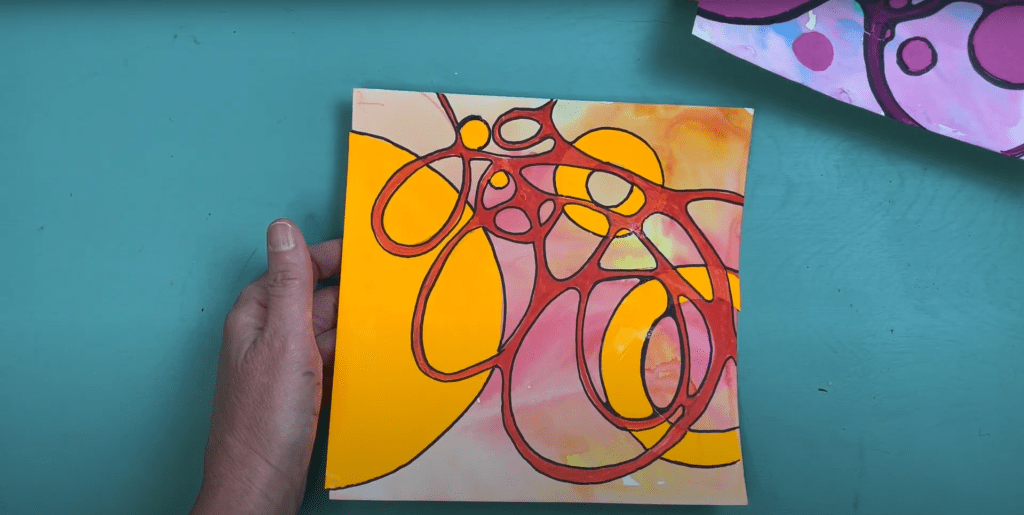
Add some neurographic doodle!
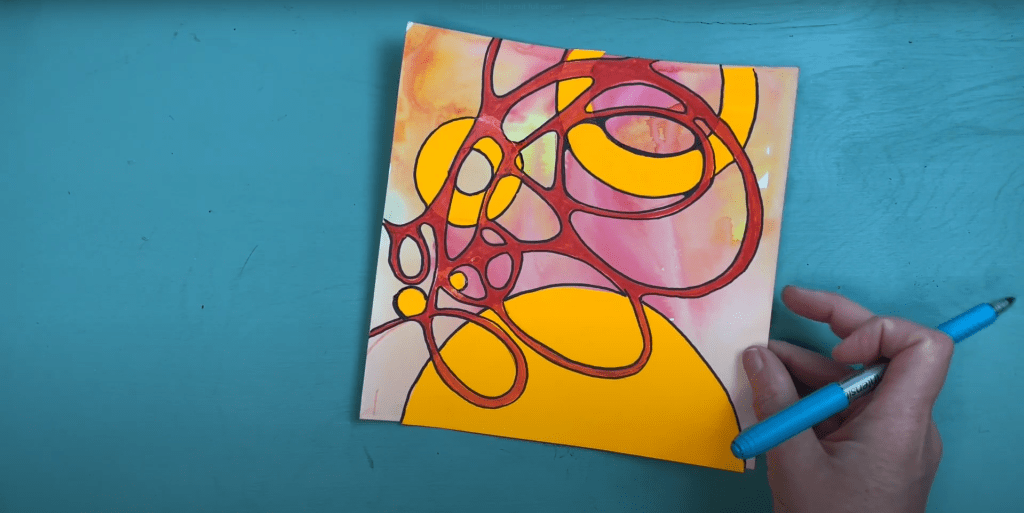
Now that we have our watercolor background and our repeated and varied shapes, it’s time to add that extra oomph with some Neurodoodle designs! Neurodoodling is all about using your creativity and imagination to create unique and intricate designs that will make your art pop.
To get started, choose a color that’s slightly darker than your shapes, and start doodling away! Think outside the box and experiment with different patterns, shapes, and textures. You can even incorporate different themes or subjects into your designs to make them even more interesting.
The key to Neurodoodling is to let your mind wander and let your pen do the talking. Don’t worry about making mistakes, because there are no rules when it comes to Neurodoodling! Just keep doodling until you’re happy with the final result.
And remember, while it’s tempting to use all the colors of the rainbow, try to stick to a similar color scheme to keep your design cohesive and visually appealing. Now go ahead and let your creativity run wild!
👉 For a deeper look at neurographic art as a design strategy, check out our Abstract Neurographic Art Design Technique tutorial.
Bonus Tip: Experiment with other techniques
Let’s dive deeper into the world of Neurodoodle! Once you’ve got your basic shape down and have added some cool designs on top, it’s time to get creative and experiment with different techniques. One fun technique to try is adding salt to your watercolor background. The salt soaks up the water and pigment in a unique way, creating a cool splatter effect that adds dimension and texture to your design.
BUT (and this is important), be aware that your paper may become a little rough, especially if you use a lot of salt. It’s not a huge deal, but it may make it a bit more challenging to use markers or other pens on the surface. So, just a little heads up – use it wisely and don’t go overboard with the salt. You don’t want to create a paper monster!
Another way to switch things up is to use different types of markers for your Neurodoodle designs. There are so many kinds of markers out there, from fine-tipped to brush-tipped, and each one can create a different effect. Try layering different types of markers on top of each other to create interesting blends and gradients.
But be careful! Make sure to test out any new techniques on a separate piece of paper first to avoid any mistakes that might ruin your masterpiece. And remember, always use materials that are safe for your paper and markers. Now, go forth and let your creativity run wild!
👉 Want to take your neurographic compositions into lettering? Try our Neurodoodle Typography Summer Art Project for a word-centric twist.
Also, while you’re at it, check out my free composition activity slideshow that serves as an accompaniment to my YouTube video!
So in conclusion, creating Neurodoodle designs is a fun and exciting way to enhance your art skills and unleash your creativity. Starting with a splashy watercolor background and repeating and varying simple shapes is just the beginning. Adding Neurodoodle designs on top is where you can really let your imagination run wild. Remember to experiment with different techniques, but always be careful and test them out before adding them to your final artwork. So, get ready to have fun, make some seriously awesome art, and let your creativity soar!
If you enjoyed exploring composition techniques with neurographic art, here are a few more creative neurographic drawing lessons and classroom ideas to try.
More Neurographic Art Lessons and Ideas for the Classroom
Neurographic Art Variations for the Classroom
Explore creative neurographic art variations that build on the mindful drawing process and expand the technique into new lesson ideas.
Simple Mindful Art Lesson Inspired by Neurographic Art
A beginner-friendly neurographic art lesson that helps students relax, focus, and create beautiful abstract designs using simple flowing lines.
Neurographic Drawing & Colored Pencil Crystals
Combine neurographic drawing with colored pencil crystals to create vibrant designs that blend mindful line work with layered color techniques.
Neurographic Art Abstract Design Technique
Learn how to transform simple neurographic lines into bold abstract compositions using pattern, color, and creative experimentation.
Neurographic Art Easy Doodle Drawing Project
An engaging neurographic art project that blends structured drawing with expressive line work to help students build confidence with mark-making.
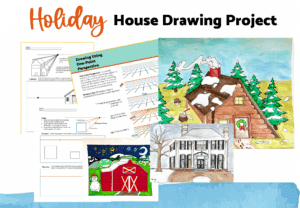
Want to Save Time or Need Ready-to-Go Reference Images and Practice Drawing Worksheets?

Look no further. This super fun Neurographic Art Easy Doodle Drawing (summer theme) contains 11 drawing reference images and practice neuro-doodle drawing worksheets, 3 x grid drawing worksheets, a 52-page slideshow, and 4 video demonstrations.
Want more themed reference images and worksheets that speak to your student’s interests?
This lesson is also included in the Neuro Doodle Drawing Mega Bundle.

The bundle includes more than 71 worksheets and 55 reference images with themes such as sports, spring, summer, and animals that are sure to interest and inspire your middle or high school art students and speak to whatever interests they have.
Related Neurographic & Line Drawing Projects
- Neurographic Art Abstract Design Technique
- Crystals Neurographic Designs
- Neurodoodle Typography Summer Art Project
- Easy Summer Line Drawing in 5 Steps
Be the first to know about discounts, freebies, and new resources!
Find me on my blog – Inside Out Art Teacher, YouTube, or Instagram.