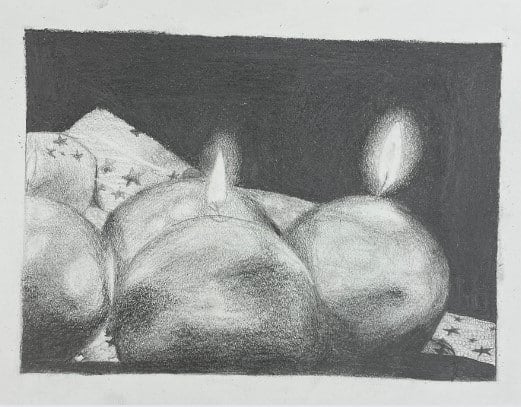
Candle drawing is more than just putting pencil to paper — it’s one of the most effective ways I’ve found to help students transition from shading practice worksheets to a finished, realistic drawing. When students first begin applying value to a full subject, they often struggle with where to place shadows, how dark to go, and how to create smooth transitions. Candles simplify those challenges in a way students can actually understand.
This candle drawing and shading project has become a reliable lesson in my classroom, especially during seasonal units or before longer drawing projects. The clear light source, simple form, and strong value range allow students to focus on applying shading skills rather than guessing what to draw. Below, I’ll walk through the same process I use with my students and explain why each step contributes to their success.
If you’re looking for more engaging drawing and shading lessons for older students, you can explore this collection of high school art projects and lesson ideas designed to build strong technical skills.
- Step 1: Measure 1 Inch All Around and Create a Nice Frame
- Step 2: Once the X Grid Is Done, Do Your Sketch
- Step 3: After Double Checking, Begin Shading
- Step 4: Continue Building the Layers
- Step 5: Pay Attention to Edges
- Step 6: Start Building Up and Deepening the Value
- Step 7: Pay Attention to Details and Finish
Whether you’re introducing shading for the first time or reinforcing value concepts later in the year, this candle drawing lesson provides students with a clear, structured path to success. The following steps outline how I guide students through the project in my classroom, from setup to finishing details.

Step 1: Measure 1 inch all around and create a nice frame for the Candle Drawing
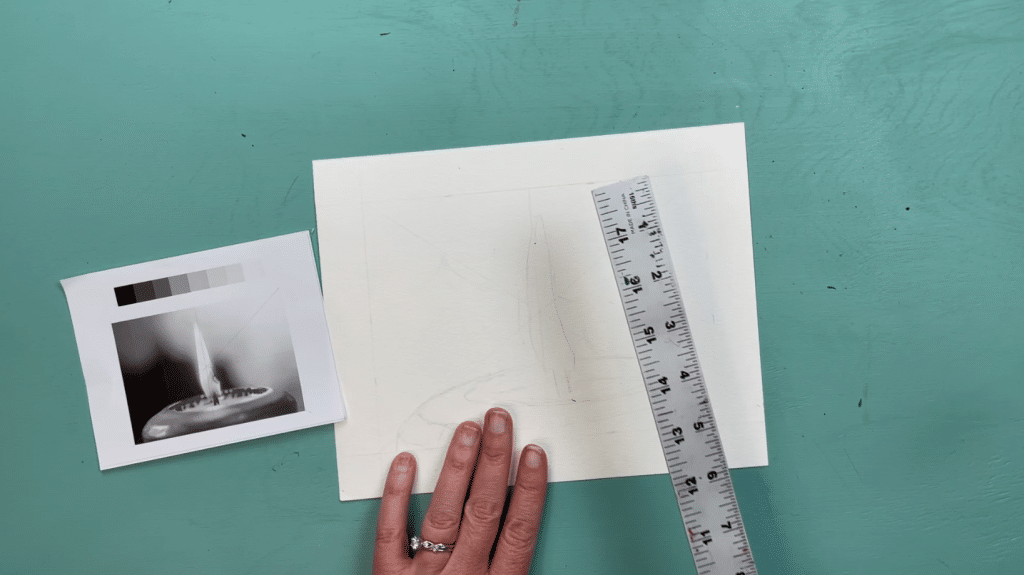
Starting with a measured frame gives students immediate structure and sets expectations for accuracy. Many students want to jump straight into shading, but this step slows them down just enough to reinforce planning and composition.
Creating a one-inch border also helps keep drawings centered and prevents common layout issues, especially for students who tend to draw too large or too close to the edge of the paper.
Now, get ready to learn a super handy technique called the X-Grid Method. It’s like having a secret weapon to nail your drawing’s proportions! Here’s how it works:

The X-Grid Method is a powerful tool for helping students with proportion, especially those who struggle with drawing accuracy. By breaking the reference image into manageable sections, students feel less overwhelmed and more confident about where shapes belong.
I have students draw the grid lightly so it can be erased later. This saves time during cleanup and reinforces good drafting habits. Once the grid is in place, students can focus on careful observation rather than guesswork.

Now comes the fun part! Transfer the grid to your drawing paper by carefully aligning your lines with the candle drawing reference image. Each section of the grid will be like a mini adventure, guiding you to accurately sketch the proportions of your candle.
Once you’ve set up the grid using the X grid method, it’s time to unleash your creativity! Add shading, intricate details, and your personal artistic flair. Get ready to bring that candle drawing to life.
Step 2: Once the X Grid is done, do your sketch
At this stage, students begin sketching the candle using light pencil lines. I encourage them to focus on overall shape and proportion rather than details. This reinforces the idea that strong drawings are built from large shapes first.
Taking time here prevents problems later. When students slow down during the sketching phase, shading becomes much easier and more successful.
Get inspired by your candle drawing reference image

Encouraging students to closely study the reference image helps strengthen observation skills. I remind students to look for simple shapes, proportions, and relationships before worrying about details.
Providing strong reference images is key to student success, which is why I include curated images, slides, and demonstrations when teaching this lesson.
If you need help finding the perfect candle drawing reference image or just want to save time looking, I’ve got you covered. You can purchase the entire lesson with images, slideshow, rubric, and video demonstration in my shop.

Map out the larger shapes

Focusing on large shapes first helps students avoid common beginner mistakes. This step is especially important for students who want to jump into details too quickly.
By treating the drawing like a construction process, students gain confidence and develop habits they can carry into future drawing projects.
Resist the urge to draw tiny details first
This is often one of the hardest habits for students to break. I remind them that details only work when the foundation is solid. Keeping the focus on proportion and placement early leads to better results later.
Double-check your candle drawing and fix any mistakes.

Before shading begins, students pause to assess their drawing. This quick check saves time and prevents frustration once shading starts.
I emphasize that adjusting the sketch is part of the process — not a mistake.
I really have to tweak the student’s mindset and drive home that this is one of the most important steps in the process. I repeatedly tell them that finding a mistake is a celebration, and that they should celebrate even completing this step. I reinforce this by letting them know they are already ahead, since most people skip this step and realize it only after it’s too late.
Step 3: After double-checking, begin shading
Once the sketch is solid, students begin shading. This is where value practice from worksheets finally clicks into place.
I remind students that shading is built gradually and that control is more important than speed.
Draw the darkest areas first

Identifying darker areas first helps students understand how light behaves on form. Candles are especially effective because the light source is clear and predictable.
Students map these areas lightly before committing to darker values.
Use light pressure and short strokes to shade the candle drawing
Using light pressure allows students to stay in control. Short strokes help maintain smooth transitions and prevent harsh lines.
This approach is especially helpful for beginners who tend to press too hard.
Do not press too hard

Rather than pressing too hard from the start, focus on mapping out where the darkest areas of the candle will be. Use light pressure to establish the general locations and shapes of these darker sections. By starting softly, you have more control over the shading and can make adjustments as needed.
Gradually build up dark values in layers, begin with light

Layering values slowly helps students create smoother shading and better depth. This step reinforces patience and observation — two skills that carry into all future drawing units.
Focus on creating smooth transitions between values in the candle drawing

Teaching students to blend values carefully prevents drawings from looking flat. I encourage students to step back frequently and assess transitions from a distance.
Step 4: Continue building the layers in the candle drawing
As students continue building layers, their drawings begin to feel more dimensional. This stage often boosts confidence because results become visibly stronger.
I remind students that realism takes time and that layering is part of the process.
Edges and Value Contrast
Defining edges thoughtfully helps drawings feel more intentional. Students learn that not every edge should be sharp and that softer transitions add realism.
Varying Stroke Direction
Changing stroke direction helps reinforce form and prevents flat shading. This step also encourages students to think about the surface they’re shading rather than filling space randomly.
Gradual Transitions
Students are reminded not to rush to the darkest values. Smooth transitions lead to stronger results and less frustration.
Step 5: Pay attention to edges of the flame
Edge control is a major focus at this stage. Students learn how soft and sharp edges affect realism.
Short, controlled strokes help refine transitions and elevate the overall quality of the drawing.
Value Comparison
Teaching students to compare values helps them self-correct. Squinting at the drawing makes value relationships easier to see and assess.
Observe and compare values

Step 6: Start building up and deepening the value
This stage pushes contrast and realism. Students deepen dark values while protecting highlights.
Layering remains the focus rather than pressing harder.
QUICK SMUDGING TIP: To prevent smudging, I recommend placing a scrap piece of paper under the drawing hand. This simple habit makes a big difference, especially for beginners.

Avoid Finger Smudging
Avoiding finger smudging helps students maintain control and preserve detail. Pencil technique leads to cleaner, more intentional results.
This simple habit keeps values clean and saves a lot of frustration for beginners.

Step 7: Pay attention to details and finish
Final details bring the drawing together. Students refine highlights, shadows, and subtle textures.
This stage emphasizes patience and attention to detail — skills that translate directly into higher-quality work.

Artistic Choices
I encourage students to make thoughtful artistic choices rather than copying the reference exactly. Adjusting backgrounds or contrast allows students to personalize their work while still meeting learning goals.

Assessment & Display
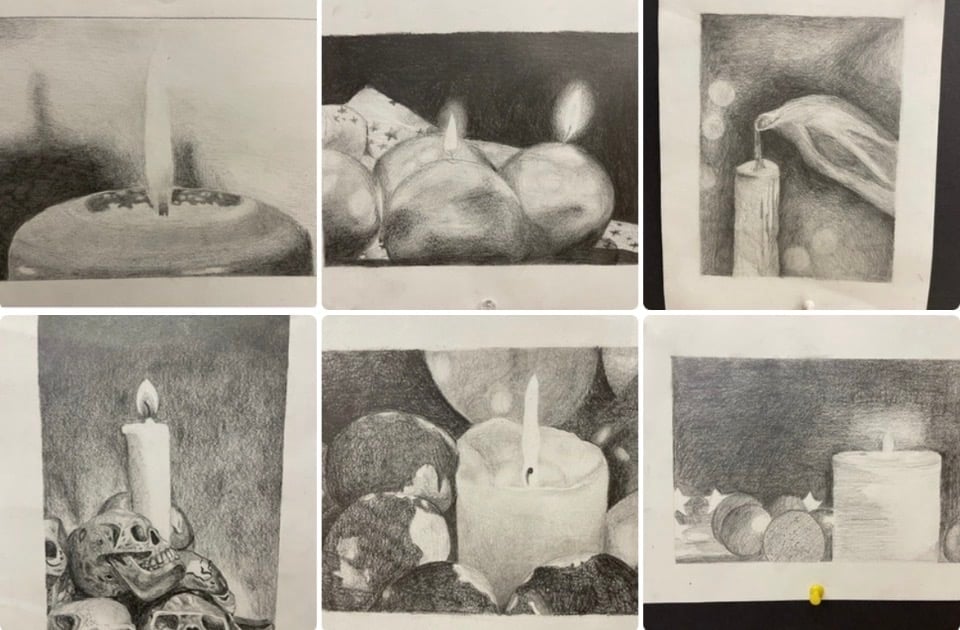
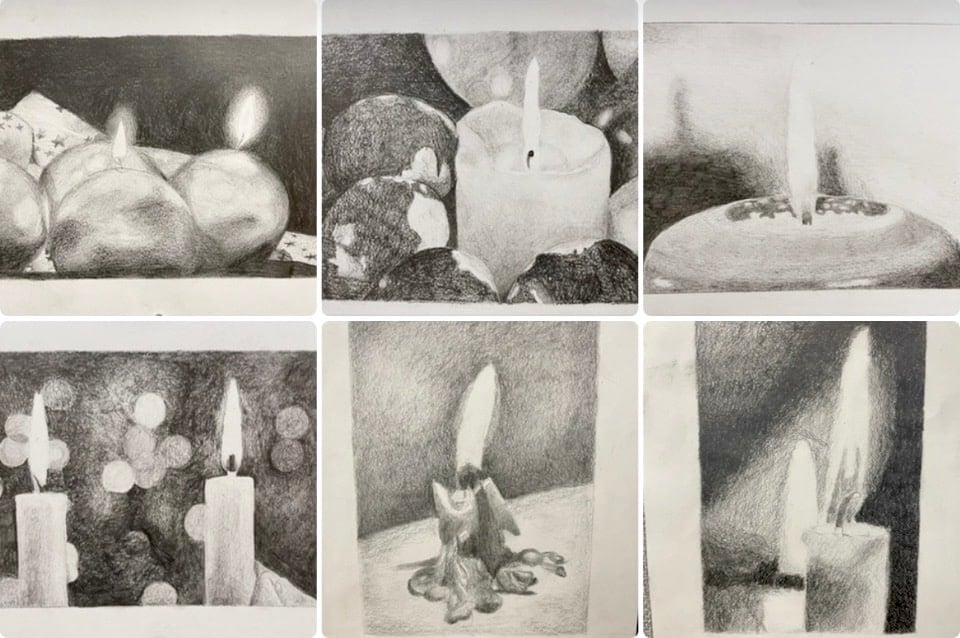
Candles are an approachable still life subject, making this project suitable for a wide range of skill levels. Finished drawings display well together and create a strong visual impact in the classroom.

How to Draw a Holiday Candle?
Candles are a versatile subject that works across seasons and cultures. Students can connect the drawing to winter themes, holidays, or symbolism related to light and reflection.
This flexibility makes the project inclusive while still skill-focused.
Summary & Final Tips
This candle drawing lesson walks students through framing, sketching, shading, layering, refining edges, deepening values, and finishing details. Each step builds on the last, creating a structured and successful drawing experience.
Most importantly, this project consistently helps students understand shading in a meaningful way — making it a lesson I return to year after year.
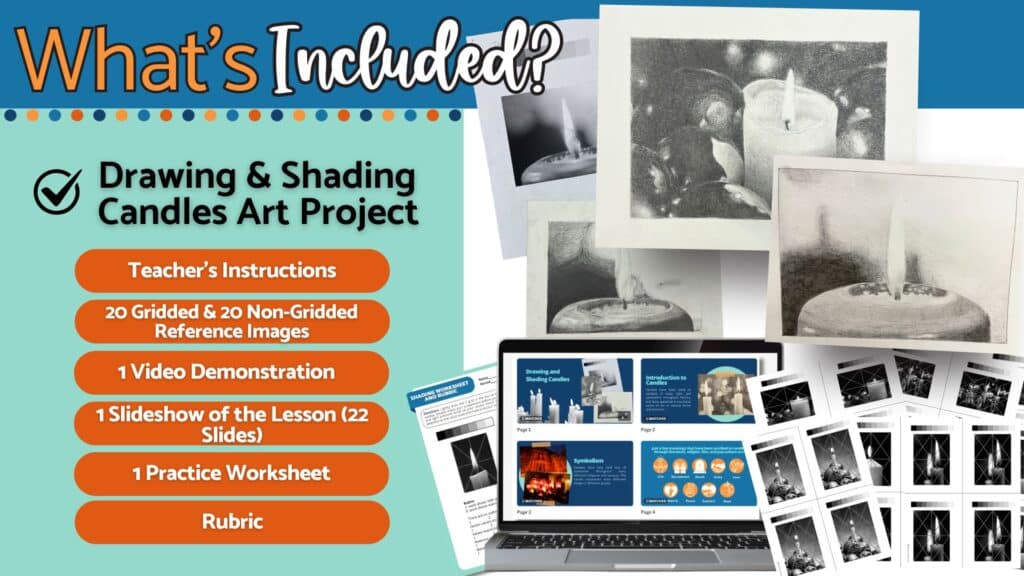
This candle drawing lesson is available as a complete classroom-ready resource with reference images, step-by-step instructions, an editable slideshow, a rubric, and a short video demonstration.
What’s included:
✅ 20 Gridded and Non-Gridded Reference Images of Candles
✅ Comprehensive Rubric
✅ 22 Slide Editable Canva Slideshow
✅ Practice Worksheet
✅ 3 Min Video Demonstration for Students
✅ Teacher Instructions