Neurographic Insect Collage: A Mixed Media Art Lesson
Finding an art project that challenges confident artists without overwhelming students who need a little more guidance isn’t always easy. This insect art lesson works well for both middle and high school students, offering a balance of structure and creative freedom, with finished artwork that looks much more complicated than the process actually is.
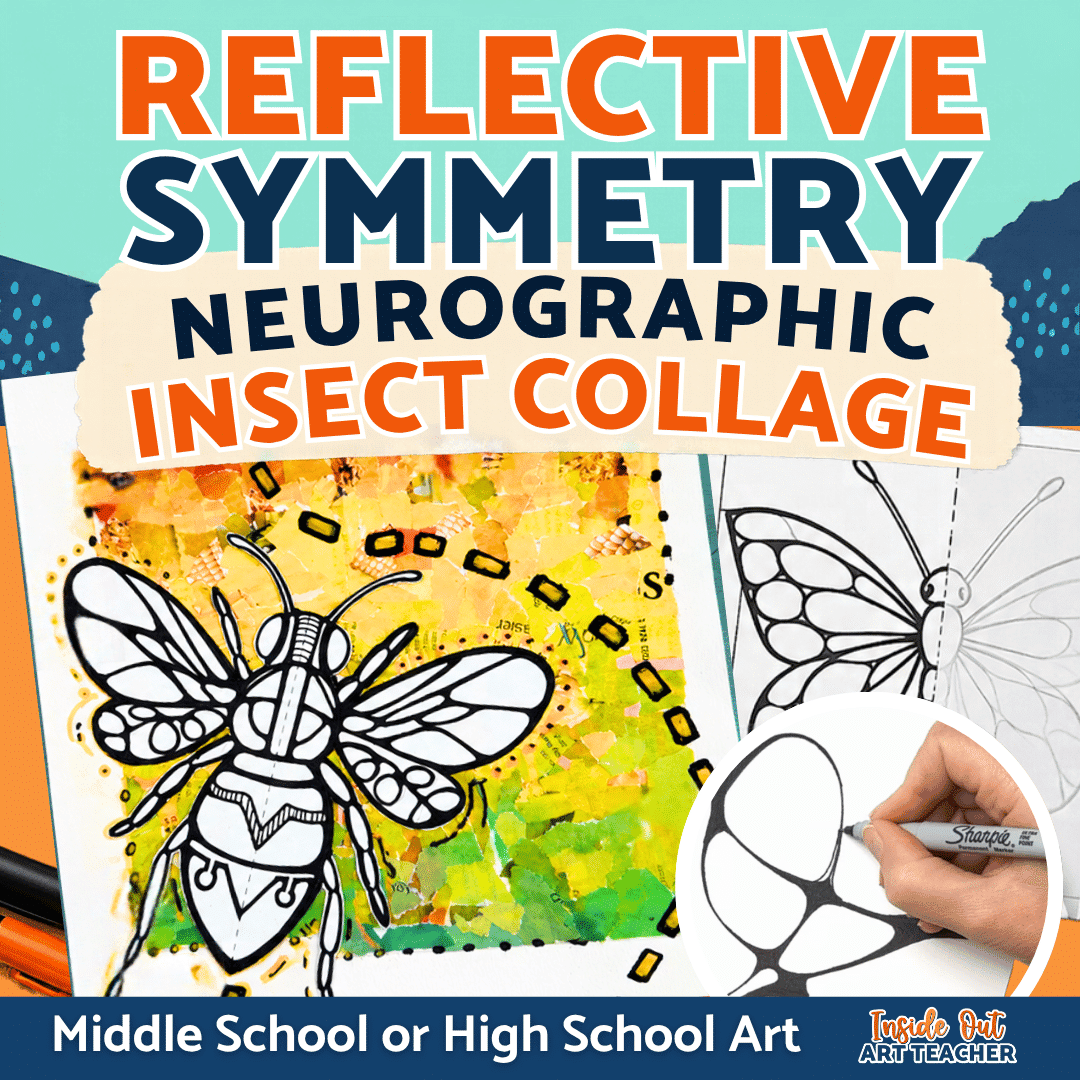
In this neurographic-inspired mixed media project, students combine symmetrical insect drawings, flowing black linework, and colorful torn-paper collage backgrounds. Along the way, they explore reflective symmetry, line variation, color, texture, contrast, and composition while making plenty of their own artistic decisions.
One of my favorite things about this project is how easily it can be adapted for different grade levels and drawing abilities. Students can design their own insects or work from half or full outlines, depending on how much support they need. And even when everyone starts with the same insect shape, the finished pieces can look completely different.
This also makes a great spring art project, especially if students choose butterflies, bees, dragonflies, or other insects. But because the focus is really on line, symmetry, and collage, it’s a project you can use any time of year.
I’ll walk you through the process step by step, share a few teaching tips to help things run smoothly, and show you how to adjust the lesson to fit your students.
What Students Learn
This insect art lesson combines several important art concepts and techniques:
Reflective symmetry: Creating a mirrored insect design using a centerline and graphite transfer.
Line and pattern: Experimenting with flowing, neurographic-inspired lines, rounded intersections, and variations in line weight.
Color and texture: Selecting, tearing, overlapping, and arranging magazine paper to create a collage background.
Contrast and focal point: Using a detailed black-and-white insect to create contrast against a colorful background.
Composition: Exploring placement, movement, and asymmetrical balance.
One of my favorite concepts to explore with this project is the difference between a symmetrical subject and an asymmetrical composition. The insect itself is symmetrical, but where students choose to place it can completely change the balance of the finished artwork.
It’s a nice way to get students thinking about how different principles of design work together rather than treating each one as a separate concept.
Step 1: Choose or Draw an Insect
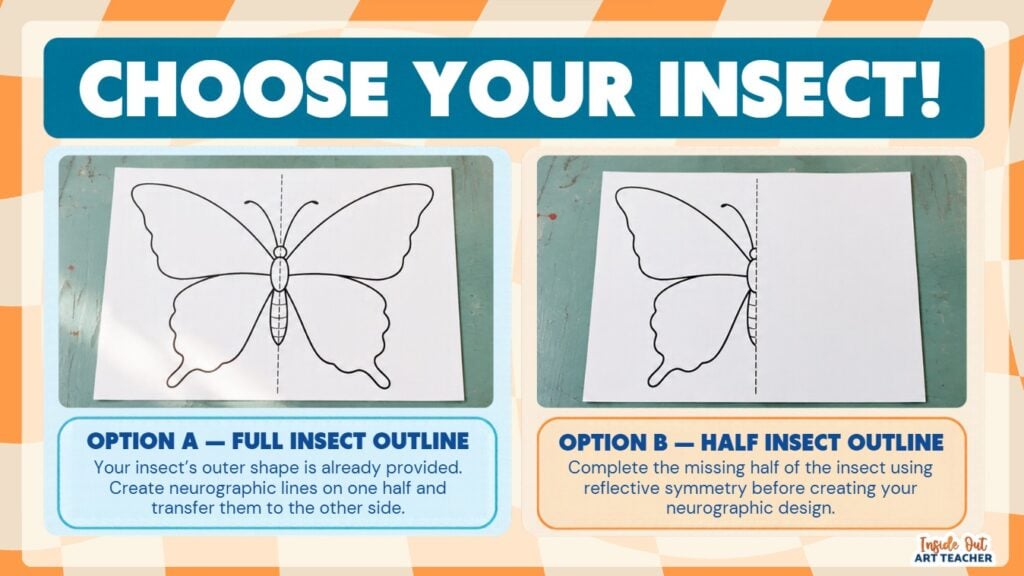
Start by having students choose an insect shape to work with. Depending on their drawing experience, they can create their own design or begin with a provided outline.
For students who are ready to draw independently, butterflies, moths, beetles, bees, and dragonflies all make interesting starting points.
For students who benefit from a little more structure, I like offering two options:
Half-insect outlines: Students complete the missing side, giving them an opportunity to practice reflective symmetry while still making their own drawing decisions.
Full-insect outlines: Students begin with the complete shape, allowing them to focus more attention on the neurographic-inspired linework and collage composition.
All three approaches lead to the same mixed media project, but give students different levels of support along the way.
Teaching Tip: Start with the Silhouette
If students are drawing their own insects, encourage them to establish the overall shape before adding details.
It’s easy for students to get caught up in tiny features like legs, antennae, or wing patterns, only to discover they’ve left themselves very little room for the flowing linework.
I encourage students to keep their initial shapes fairly simple, with clearly defined wings and body sections. The goal isn’t a perfectly realistic insect drawing. It’s creating a strong shape that gives them plenty of space to explore the linework in the next step.
Step 2: Explore Flowing Lines and Organic Shapes
Once students have their insect designs, have them draw long, flowing pencil lines across one half of the insect.
Encourage students to let their lines curve, overlap, and travel through the shape rather than making lots of short, disconnected marks. As the lines intersect, they’ll create a variety of organic shapes that become the foundation for the neurographic-inspired design.
Students only need to work on one half of the insect for now. They’ll transfer the linework to the opposite side in the next step.
Teaching Tip: More Lines Aren’t Always Better
Students sometimes assume that adding more lines will make their drawings more interesting. But too many closely packed lines can create tiny spaces that become difficult to work with later.
I like to show two examples: one crowded with lines and another with a combination of larger and smaller shapes. Ask students which one feels easier to follow and why.
Remind them that they don’t need to fill every space or make every curve perfect. A little variety—and some breathing room—can make the finished design much more interesting.
Step 3: Create Reflective Symmetry with Graphite Transfer
One of my favorite techniques to demonstrate is graphite transfer. It’s a simple way for students to create reflective symmetry without having to draw the same design twice.
Once students have completed their linework on one half of the insect, they’re ready to transfer it to the opposite side.
Here’s how:
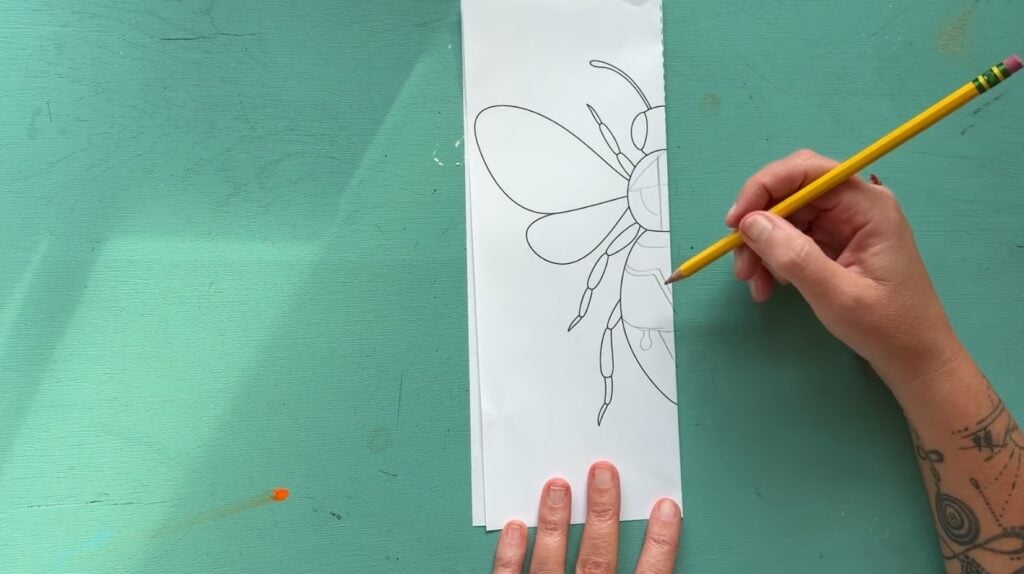
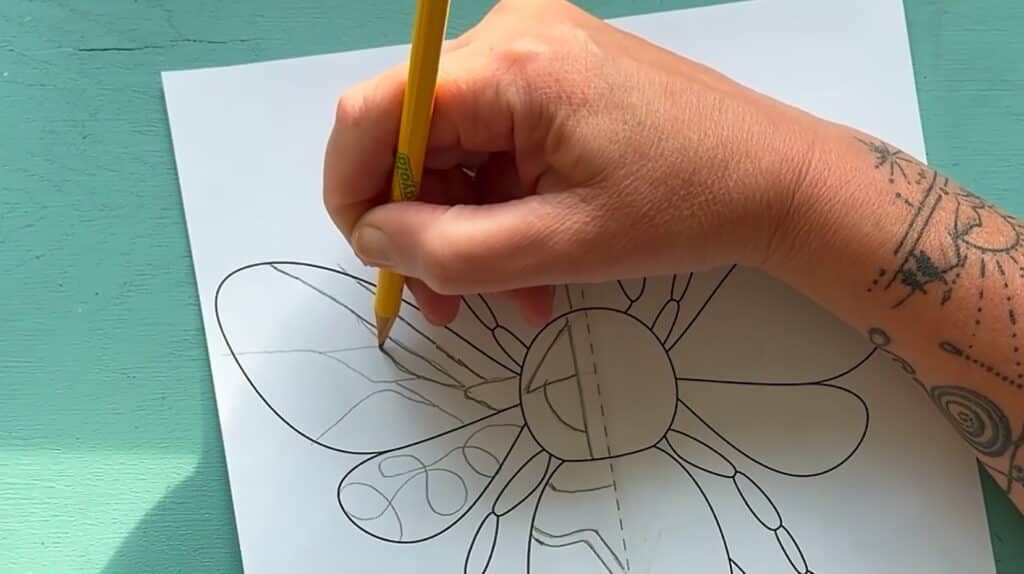
Darken the pencil lines. Have students go back over their original drawing, pressing firmly enough to leave a good amount of graphite on the paper.
Fold along the centerline. Make sure the drawn side faces inward, touching the blank half of the insect.
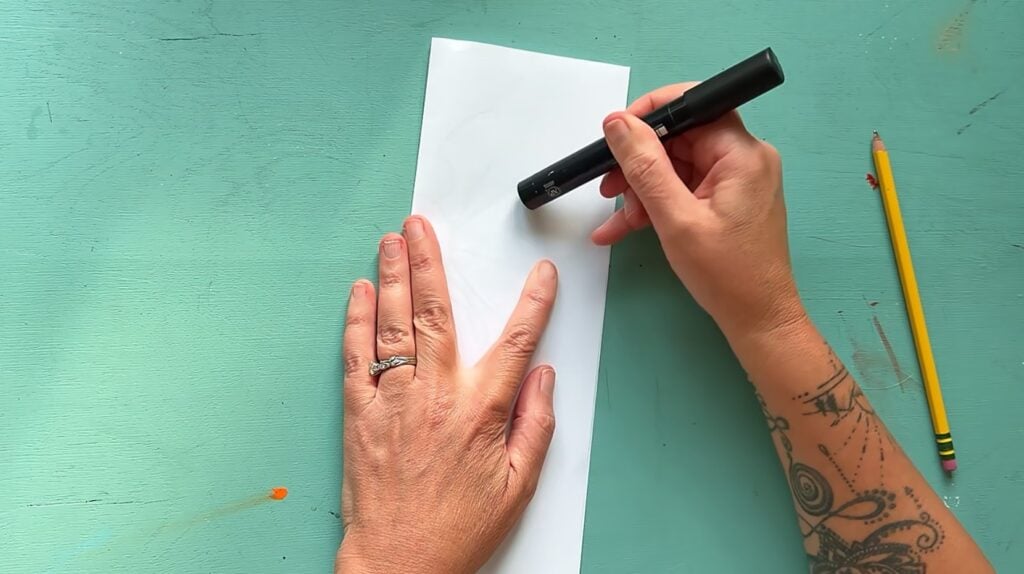
Transfer the drawing. Rub firmly over the back of the folded paper using the smooth barrel of a marker.
Unfold the paper. Students should see a mirrored version of their original linework.
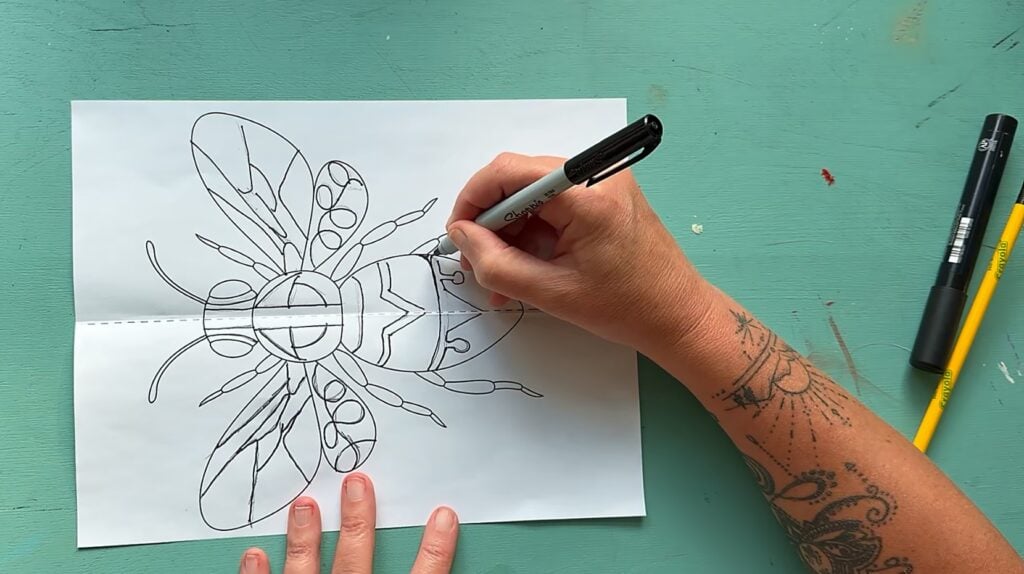
Strengthen the transferred lines. Retrace any faint areas so both halves of the design are easy to see.
Teaching Tip: Pencil Pressure Makes a Big Difference
If students unfold their papers and discover that barely anything transferred, the problem is usually either pencil pressure or the direction of the fold.
I like to demonstrate the difference between light and dark pencil lines before students begin. It’s also worth showing exactly how to fold the paper so the graphite comes into contact with the opposite side.
Once students reveal their symmetrical designs, take a moment to have them identify the line of symmetry and compare the two halves. It’s a simple way to reinforce the concept while they’re seeing it happen right in front of them.
And if some of the transferred lines are faint, no problem. Students can retrace them before moving on to the next step.
Step 4: Create Neurographic-Inspired Linework
Now that the symmetrical insect drawing is complete, students can begin developing their neurographic-inspired linework.
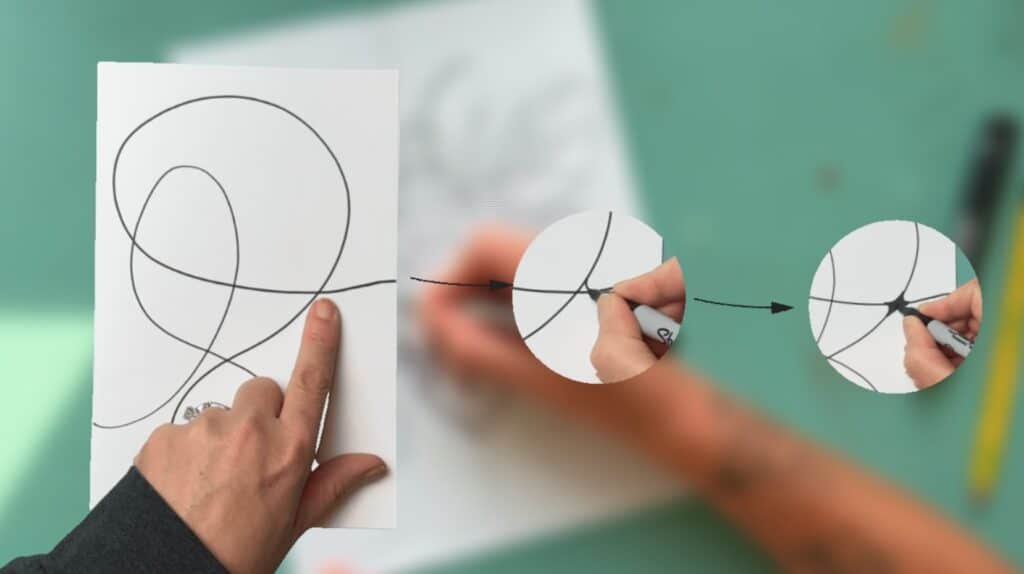
Start by having students trace their pencil lines with a fine-tip black marker. Next, they’ll round off the sharp corners where lines intersect, turning pointed angles into smooth, curved connections.
This simple technique softens the intersections and gives the linework a more flowing, connected appearance.
If you’re new to this drawing technique, I’ve shared more neurographic art variations you can try with students.
Teaching Tip: Show the Difference
Before students begin, demonstrate the difference between a sharp intersection and a rounded one. A quick side-by-side example of a pointed V-shaped connection and a smooth U-shaped curve makes the technique much easier to understand.
I also like having students practice rounding a few intersections on scrap paper first. It only takes a minute and gives them a chance to get comfortable with the technique before working on their insect drawings.
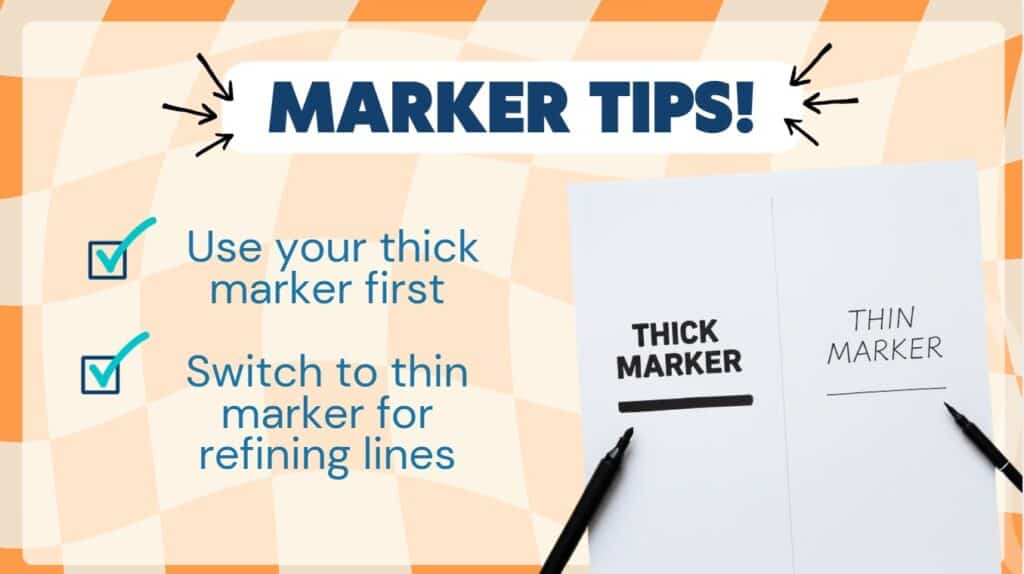
Teaching Tip: Vary the Line Weight
Once students have rounded their intersections, encourage them to experiment with line weight by thickening selected areas of their design.
This is a good opportunity to compare a drawing where every line is the same thickness with one that has a combination of bold and thin lines. Ask students which areas stand out and where their eyes are drawn first.
Remind them that they don’t need to thicken every line. A little variation can add depth, create emphasis, and make the design more visually interesting.
Once the linework is complete, students can carefully cut out their insects.
Step 5: Create a Colorful Torn-Paper Collage
With the insect drawings finished, it’s time to shift gears and create the colorful collage backgrounds.
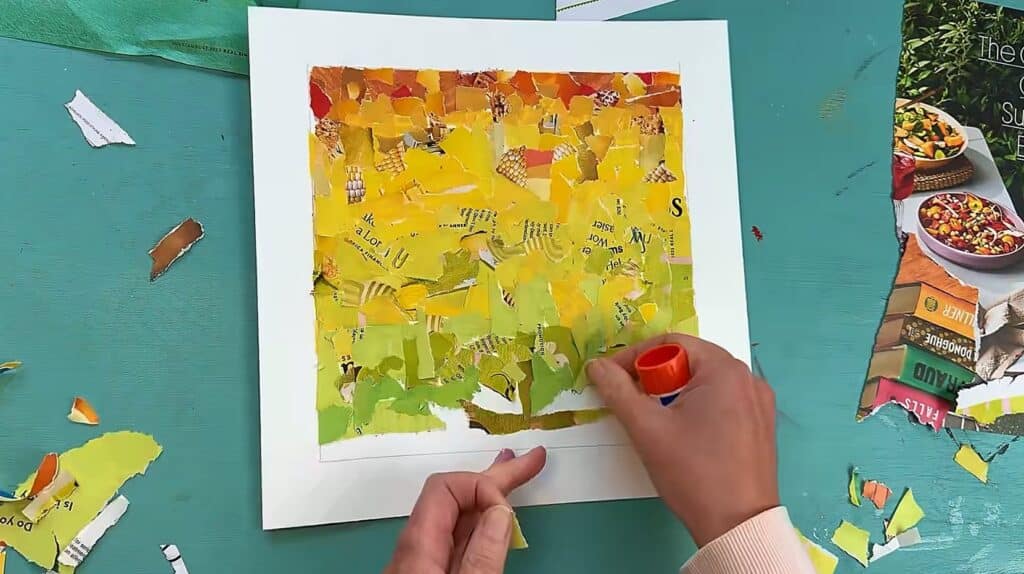
I start with an 11 × 11-inch sheet of paper and have students measure a 1-inch border, leaving a 9 × 9-inch space for their collage.
Students search through old magazines for interesting colors, patterns, and textures, then tear the pages into pieces to arrange within the border.
I love using magazine paper for this because students can work with colors and textures they might not think to create on their own. A small piece of a photograph or printed pattern can take on an entirely different appearance when it’s combined with other colors and shapes.
Before students start gluing, encourage them to think about their color choices and overall composition. Some may prefer a limited color palette, while others might want bold contrasts. Both approaches can work as long as their choices are intentional.
I like having students arrange their torn magazine pieces first, experimenting with overlapping shapes, repeating colors, and different placements before attaching anything permanently.
As they work, ask them to consider:
Which colors could you repeat to help tie the composition together?
Where could you add more contrast?
Does the arrangement feel balanced, or is too much happening in one area?
Encourage students to step back and look at their compositions before reaching for the glue. Sometimes moving just a few pieces makes a big difference.
Once they’re happy with the arrangement, they can begin gluing everything down.
Step 6: Combine the Insect and Collage
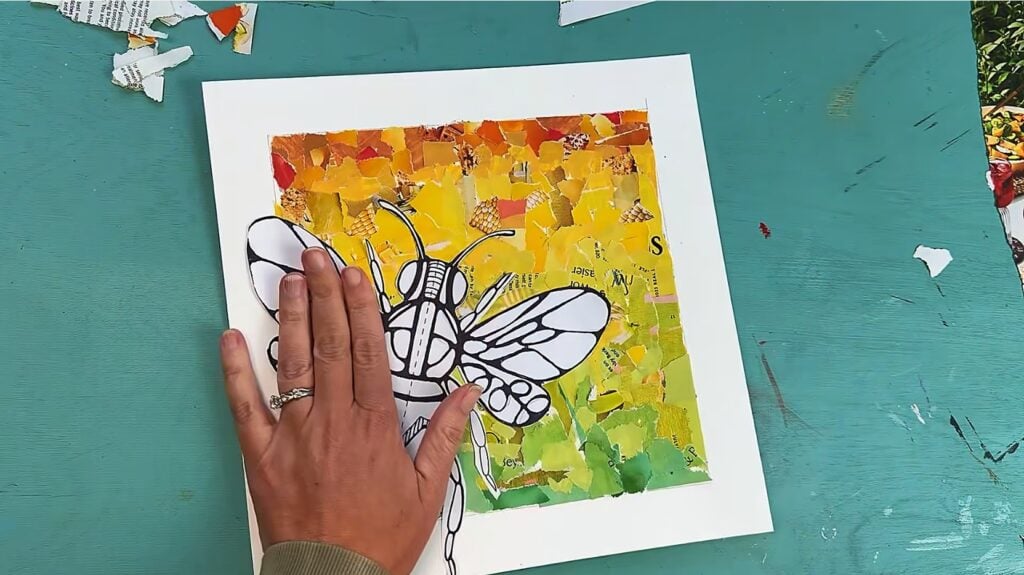
Now it’s time to bring the two parts of the project together! Students place their black-and-white insect drawings over their colorful collage backgrounds. The detailed linework stands out against the colors and textures, helping the insect become the focal point.
Before gluing anything down, encourage students to experiment with different placements and consider how the insect interacts with the background.
Teaching Tip: Experiment with Placement
Students often automatically place their main subject right in the center. Encourage them to try moving their insects higher, lower, or off to one side.
Ask them how each placement changes the overall composition. Does it create a different sense of balance or movement?
This is a good opportunity to revisit asymmetrical balance and show students that even a symmetrical subject can be part of an asymmetrical composition.
Once students have chosen their placement, they can glue their insects onto the backgrounds.
For the finishing touches, students can add small black dots, dashes, or other marks around their insects to create movement and visually connect the drawing to the collage.
Remind them that a little goes a long way! The added details should complement the insect rather than compete with it.
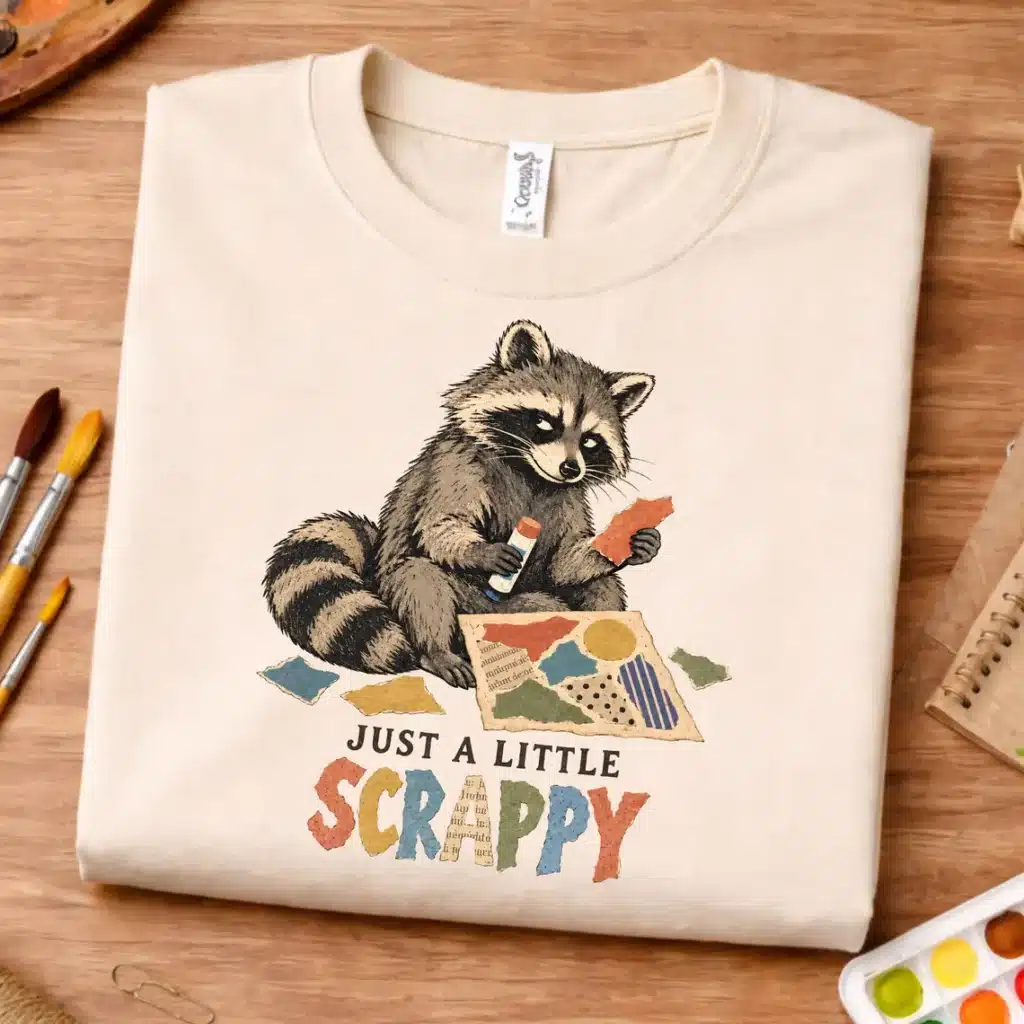
Art Teacher Shirts for Studio Days
You know that point in a collage lesson when there’s more paper on the table than on the artwork? I always want to save the good scraps, even the tiny ones. If that sounds like your art room too, here are a few shirts from my shop that felt right for this project.
How to Adapt This Insect Art Lesson for Middle and High School
One of the things I like about this project is that it can work with a wide range of drawing abilities. The basic process stays the same, but you can adjust the level of support and complexity depending on your students.
For students who need more guidance: Provide full or half-insect outlines, demonstrate the linework techniques in smaller steps, and consider limiting the collage to a few coordinating colors.
For students ready for more independence: Encourage them to draw their own insects, experiment with more complex line patterns, and make deliberate choices about line weight, contrast, and composition.
For an added challenge: Have students develop a specific color scheme for their collage, explore more sophisticated arrangements, or use asymmetrical balance to create a stronger sense of movement.
These adjustments aren’t necessarily tied to grade level. Some middle school students may be ready to work independently, while high school beginners might benefit from more structure. The goal is to keep the art concepts consistent while allowing students to approach them at an appropriate level.
Reflecting on the Finished Artwork
Once the projects are finished, try displaying several pieces together so students can see how differently the same techniques can be interpreted.
This is a great opportunity for a quick class discussion. Ask students:
How did different artists use line weight and variation?
What makes the insect stand out against the collage background?
How does the placement of the insect affect the overall composition?
I also like having students identify one artistic decision they’re especially happy with and something they might approach differently next time.
It’s a simple way to get students thinking about their creative choices rather than just whether their artwork is finished.
If you’d like to try this project without spending your planning time putting all the materials together, I’ve already done that part for you.
My complete Neurographic Insect Collage lesson includes printable half and full insect outlines, a teacher presentation, instructional videos, teacher directions, and additional classroom resources.
You can adjust the lesson to fit your students, skip the extra prep, and get right to teaching.
And if you’re putting together your own version, I hope you’ve picked up a few ideas you can use in your classroom!